Author

Diana Laskaris

Browsing

Chicken kebabs are delicious and easy. The good news is that you don’t need a grill to make this recipe. If you have a grill you can certainly use it to make the perfect grilled chicken kababs as well as any other meat kebabs and vegetable kebabs. If you don’t have a grill you can still create tasty chicken kabobs in the oven.


Chicken Kebab With Peppers

No Need For A Grill

But if you don’t have a grill or want an easy way to make your kebabs in the oven, here’s our easy healthy chicken kebab recipe that will give you all the flavor without a grill.

There are so many combinations for chicken kebobs in the oven, you could make many different dinners just by changing the spices, marinades, veggies or sides.


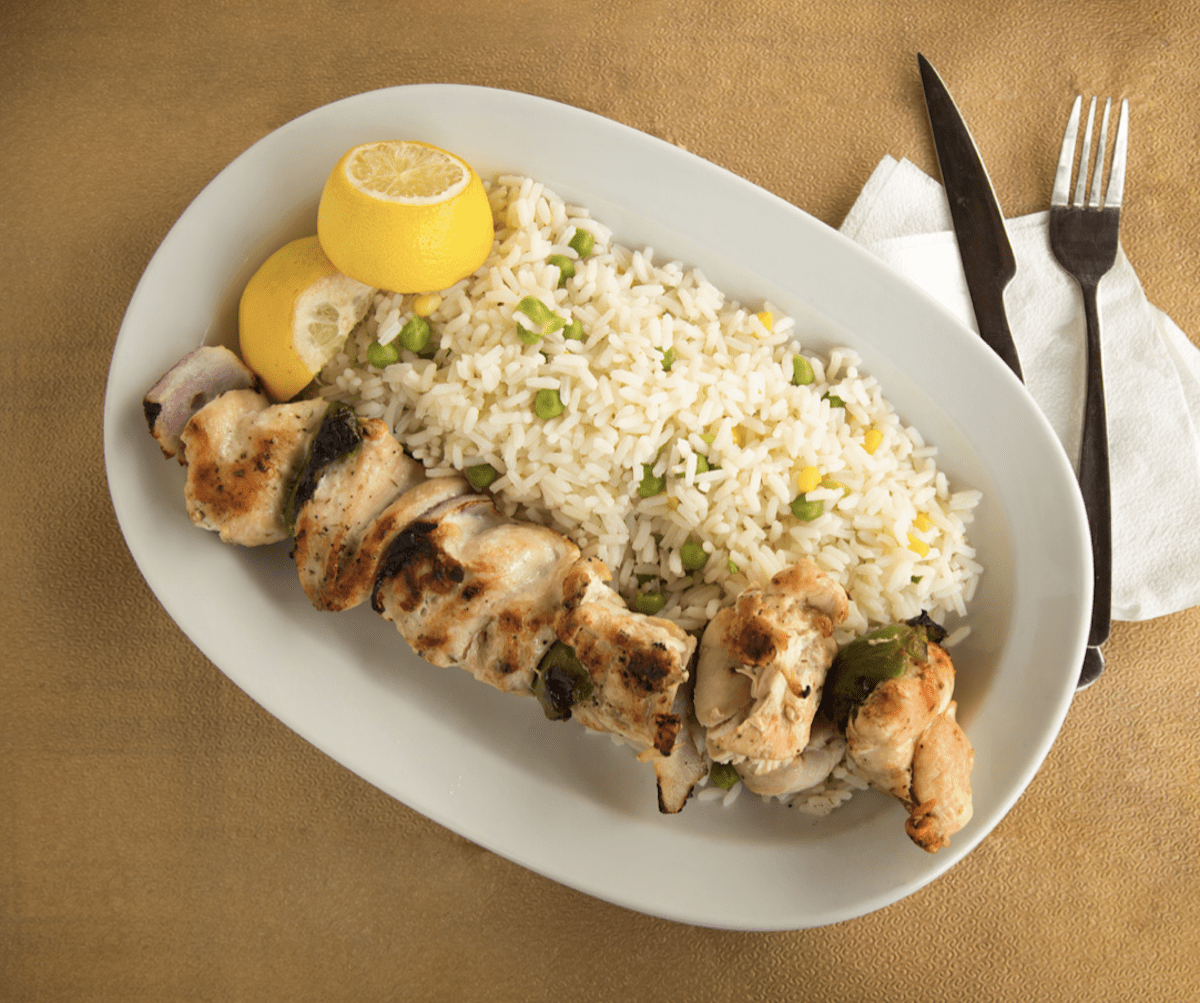
Rice Is A Great Side Dish


We’ll give you our own favorite chicken kebab recipe as well as some other ideas you can use to spark your own imagination.

A Few Pro Tips

There are just a couple of things to be aware of when you’re making grilled chicken skewers in the oven. First, you’ll want to use bamboo skewers, which are easy to work with. But in order to be sure they don’t burn from the constant heat, you’ll want to soak them for a few hours in water. We just put them in the night before and let them soak while we’re sleeping. That way when we’re ready to cook, we don’t even have to think about it.


Soak Bamboo Skewers And Make Chicken Kebabs In The Oven
Soak Bamboo Skewers And Make Chicken Kebabs In Oven


Another tip is that grilled chicken kebobs, or any meat you want to use on a kebab, do well when they have a chance to marinade. That’s why we usually cut our chicken into pieces and put them into the marinade the night before. We can do this when we start the bamboo skewers soaking so we only need one trip to the kitchen.

Chicken Kebab Marinade

You can choose whatever marinade you like. Generally, for a marinade to have an impact you’ll want there to be a component of oil and a component of acid. These two things work together to tenderize and infuse the meat with tons of flavor at the same time.

Marinade Adds Flavor To Chicken Kebabs

We typically use a marinade that includes balsamic vinegar and olive oil. We also add our spices to the marinade, so it’s kind of a one-step process. You can choose all kinds of marinade flavors. If you like things spicy, you can add some chili pepper flakes or sriracha or harissa into your marinade. We love garlic so there’s going to be plenty in our marinade.

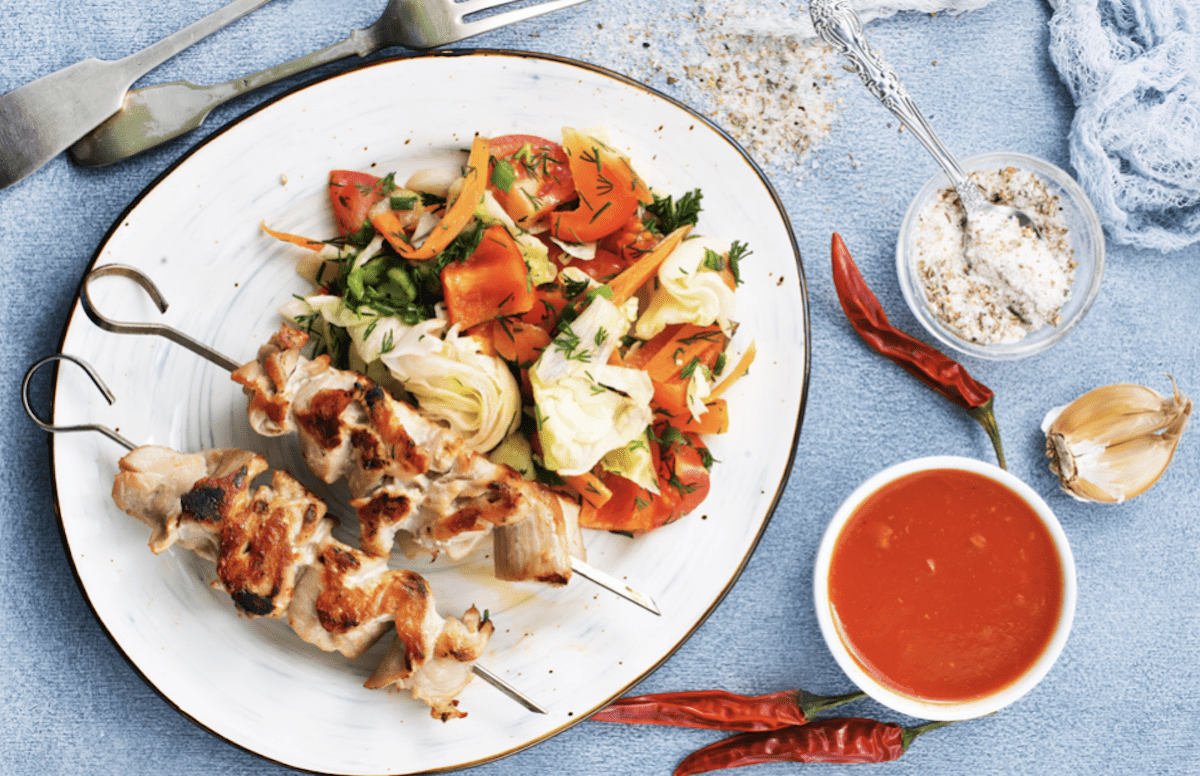
Add Some Heat With A Spicy Sauce If You Like

Is A Chicken Kebab Healthy?

Chicken kebabs make a great meal and they’re low carb. Vegetarian kebabs are also delicious and you can eat them all on their own if you want.

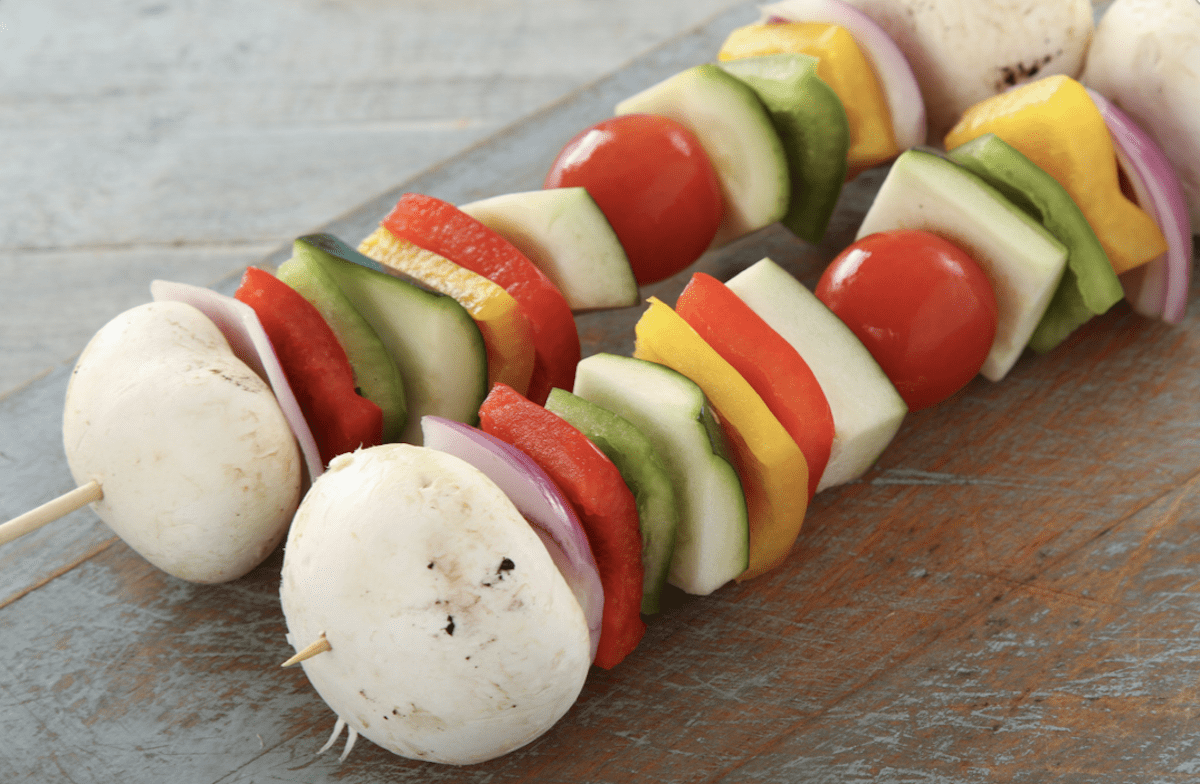
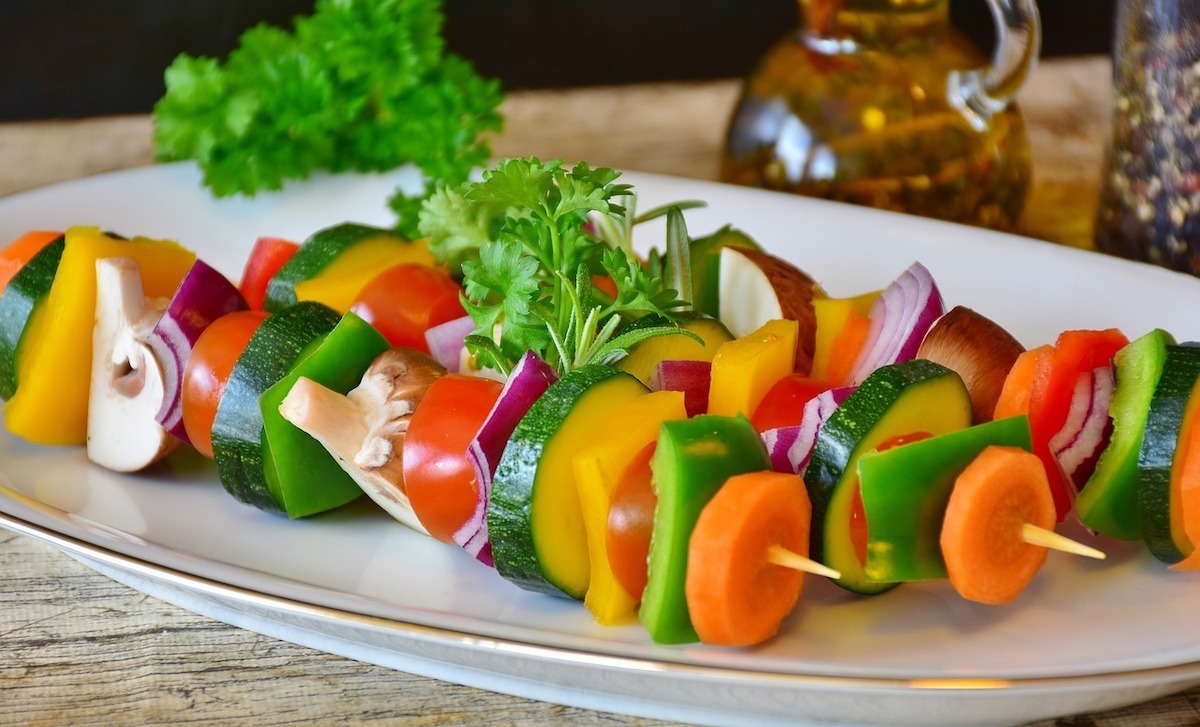
Perfect Vegetable Kebabs

You have your choice of whether you want to combine meat and veggies on one kebab or separate them out. The choice is up to you. Either way, they are delicious!

Choose Whatever Veggies You Like

Don’t Forget The Sides

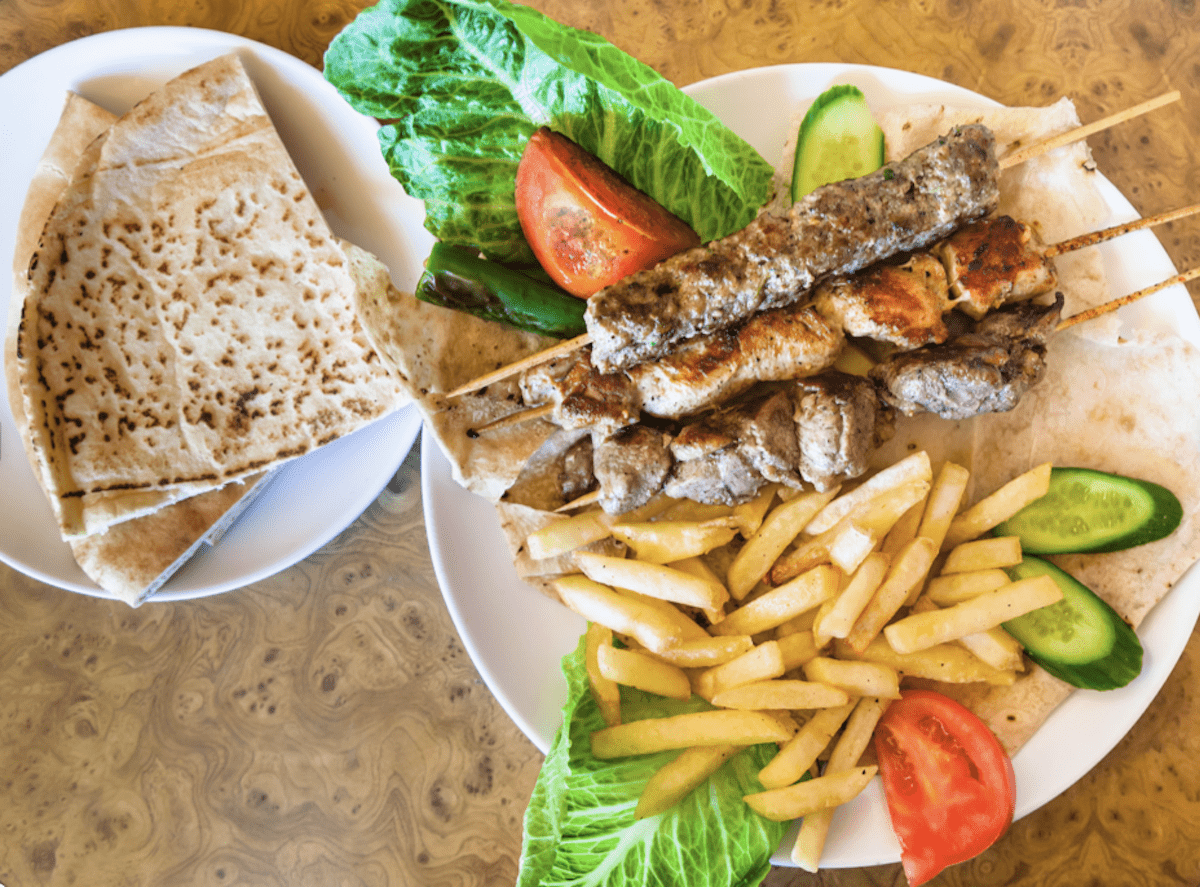
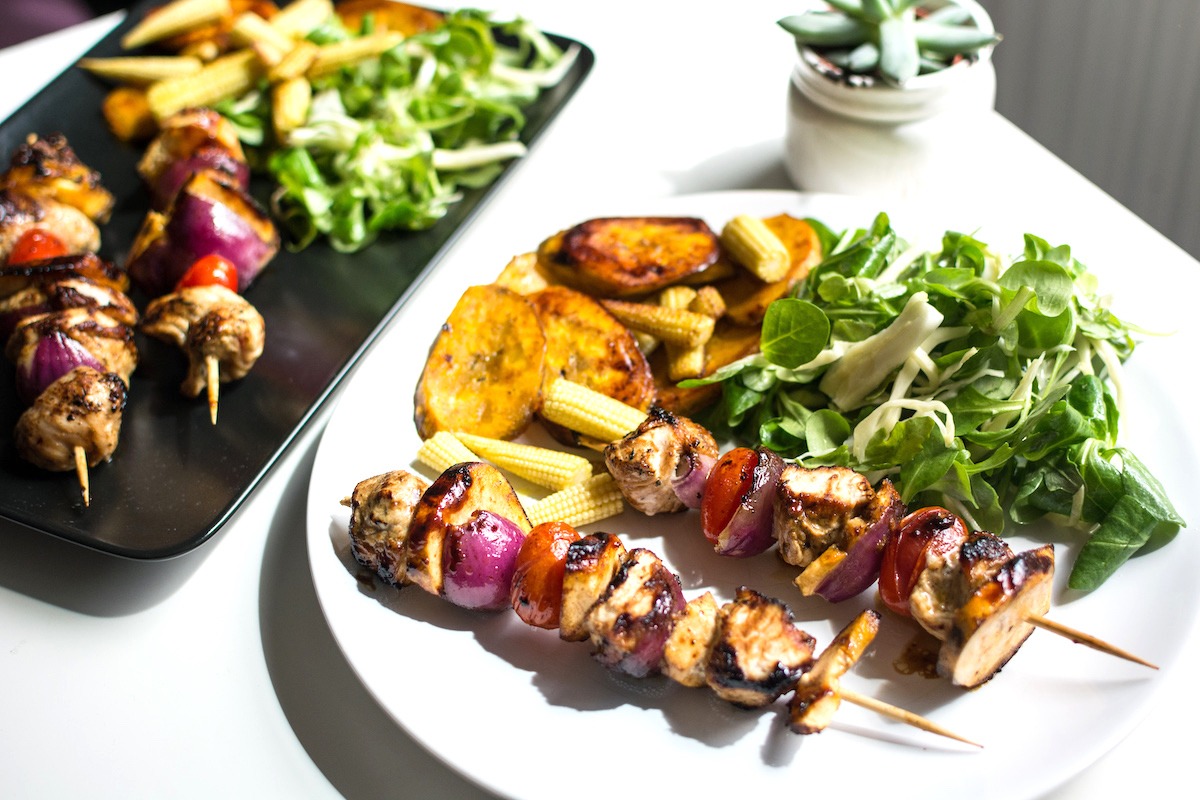
For a full meal, we love adding a side dish of rice or French fries and salad. You can mix it up by using sides from whatever cuisine you’re spicing your kebabs with. Edamame and white rice go well with soy sauce or tamari and rice vinegar marinade. Hummus and couscous are fun with an olive oil and lemon marinade. We often add tzatziki and pita to our vegetable kebabs and chicken kebabs. The choice is up to you.

We Would Like Fries With That - And Pita
We Would Like Fries With That – And Pita

And while we’re making chicken kebabs, you can use whatever meat you prefer. Or make an all vegetable kebab meal. Portobello mushrooms, eggplant, zucchini, and even cauliflower, are great for more substantial veggies if you’re sticking with those alone.

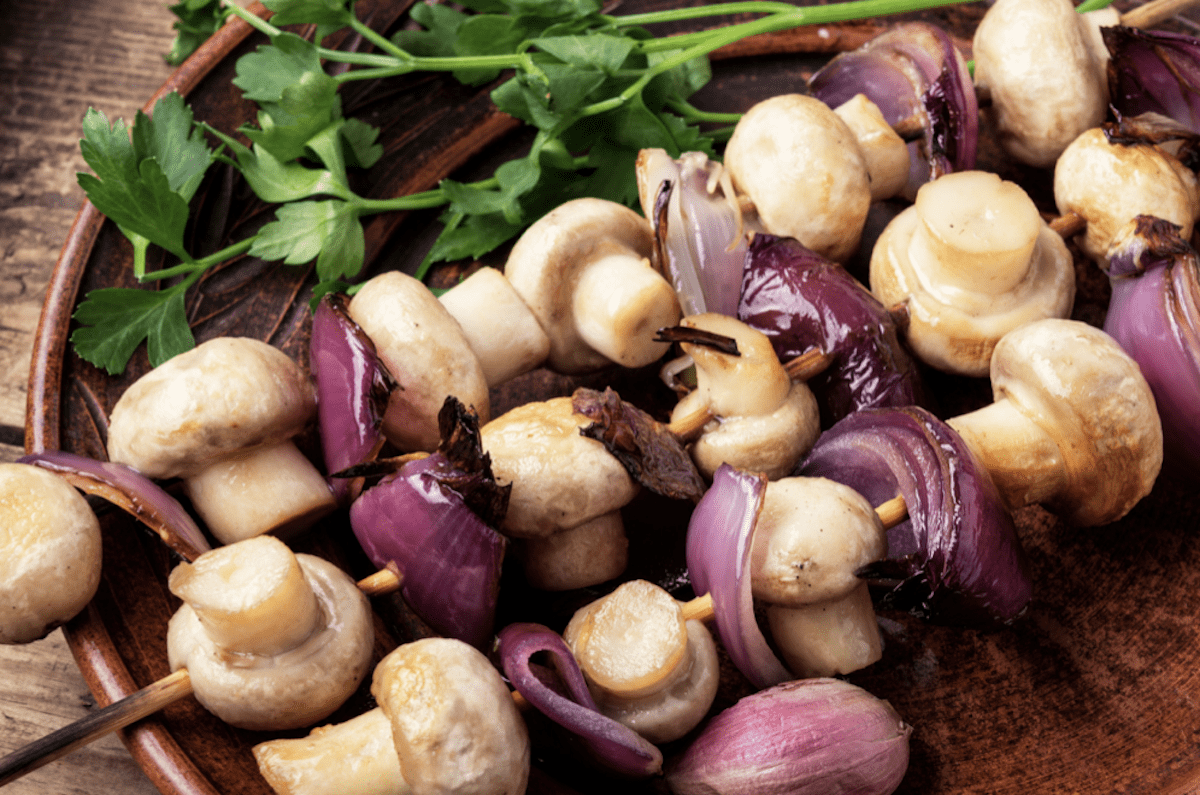
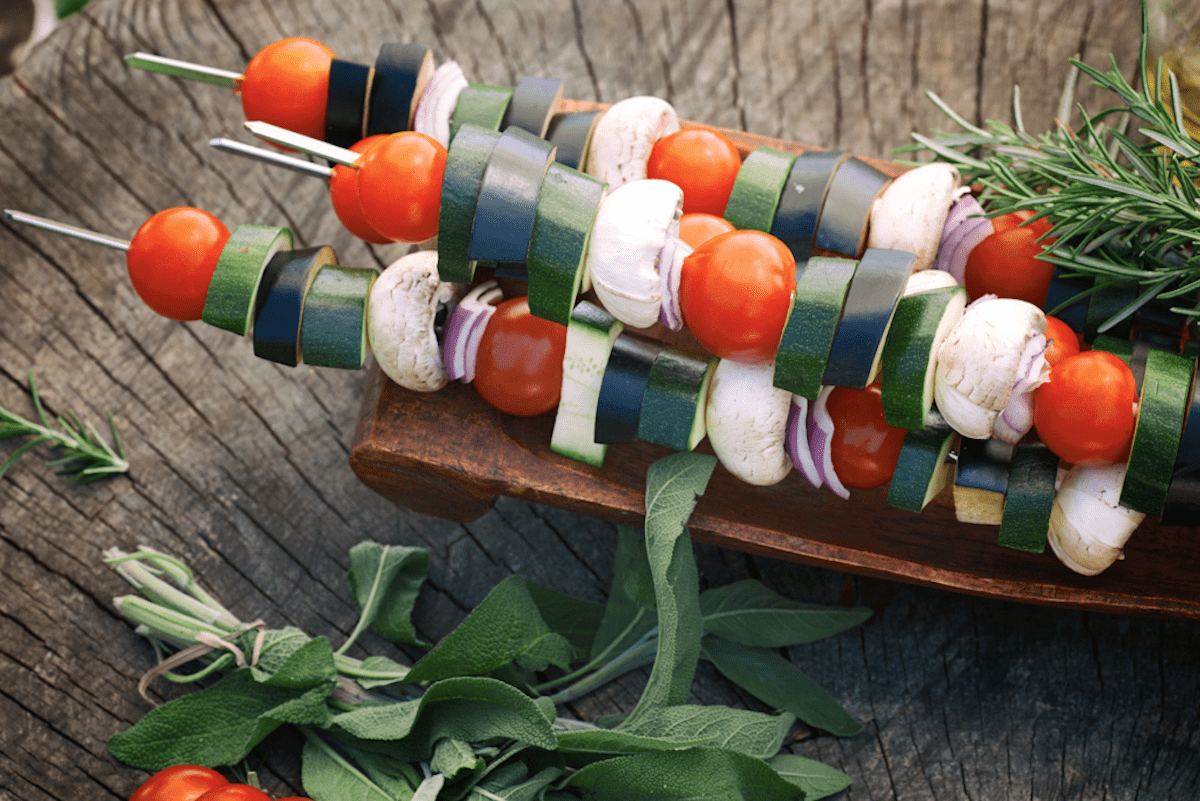
Tomato Mushroom Onion And Zucchini Are Naturals

Even Desserts

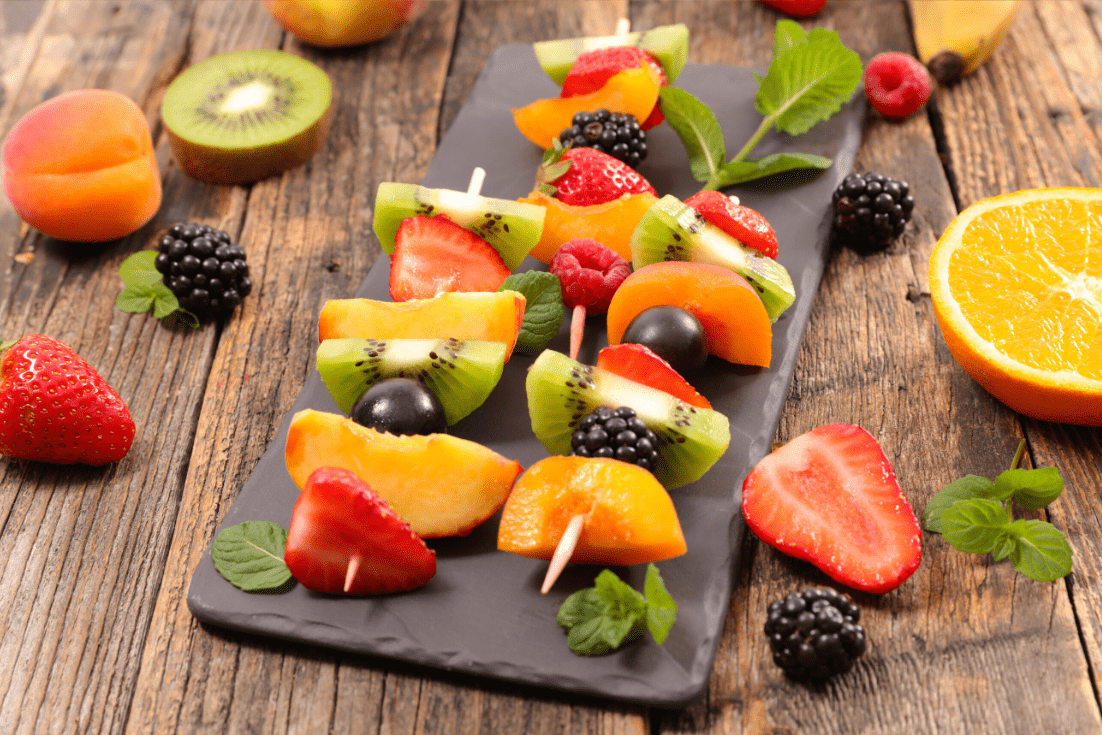
Put some fruit on a skewer and your whole meal is easy and delicious. Choose your favorites, slice them up put them on a stick and you’re ready to go. You can grill the fruit or just eat it naturally. If you’re looking for something different throw a few slices of pound cake on the grill to warm it up, cut in cubes, and add that to your fruit skewers. A couple of bowls of whipped cream and melted chocolate make for wonderful dipping, too.

Fruit Skewers
Fruit Skewers

The skewers you create are limited only to your imagination and what you have in your fridge and pantry.


Pound Cake and Fruit Skewers

Chicken Kebab Appetizers

You can also use chicken kebabs as an appetizer by making small kebabs. They’re cute and colorful as well.

Petit Kebabs Make A Great Appetizer Too

Let your imagination and your taste buds be your guide. We think you’ll find these easy chicken recipes for dinner for families. Now you know you don’t have to have a grill to make our delicious baked chicken kebobs recipe right in your own kitchen.

Easy Chicken Kebab Recipe

Vegetable And Chicken Kebabs

Ingredients

For The Marinade

1/2 cup extra virgin olive oil
1/4 cup balsamic vinegar
2 cloves of garlic smashed and minced
1 teaspoon each of dried oregano, basil, and parsley
Salt and pepper to taste

Vegetable Kebabs Are Great On Their Own Too

For The Kebabs

1 pound chicken breast or thighs, skinless boneless, cut into 1 1/2 inch pieces
A combination of vegetables as you prefer. It can include colorful bell peppers, grape or cherry tomatoes, mushrooms, onions, zucchini, eggplant, etc. Cut vegetables into evenly sized pieces.

Directions

1. Soak 6 skewers in water overnight to prevent burning.
2. Cut the chicken into 1 1/2-inch pieces.
3. Make the marinade by combining all ingredients for the marinade in a ziplock bag or container.
4. Put the chicken pieces in the marinade and soak them overnight in the refrigerator.
5. About 1 hour before you want to eat, set the oven on broil. You can use low or high broil depending on your oven. You can start with low and switch to high if it is taking too long.
6. Just be sure to lower the rack in the oven and keep watching so you don’t burn the food.
7. Remove the chicken from the refrigerator.
8. Cut the veggies and add them to the marinade.


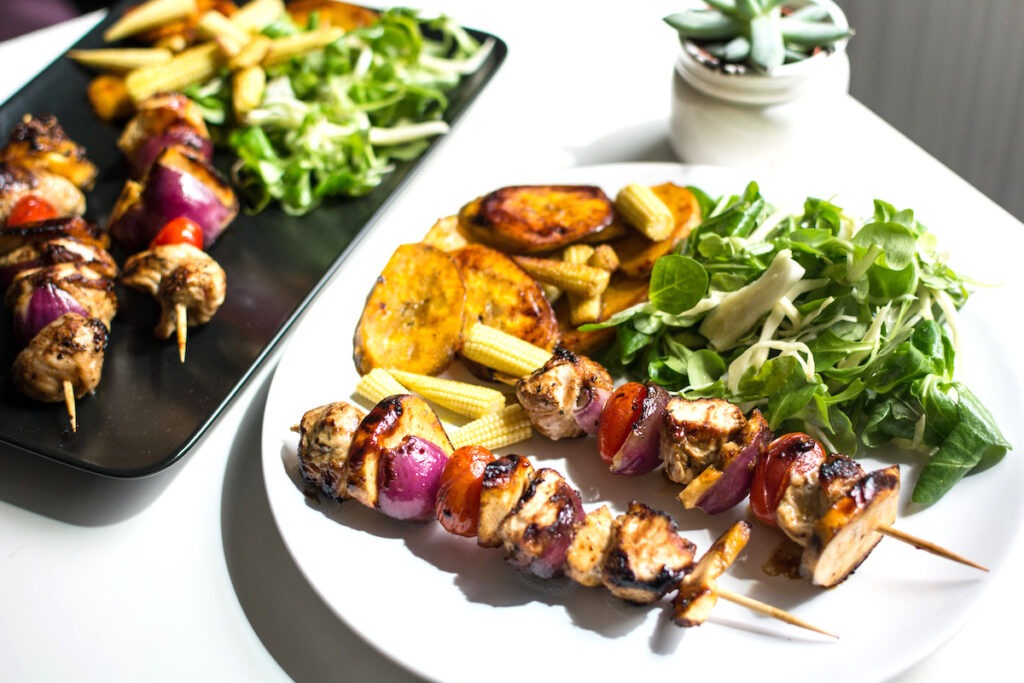
Delicious Chicken And Vegetable Kebabs


9. Line a baking sheet with foil.
10. Remove the bamboo skewers from water and dry them.
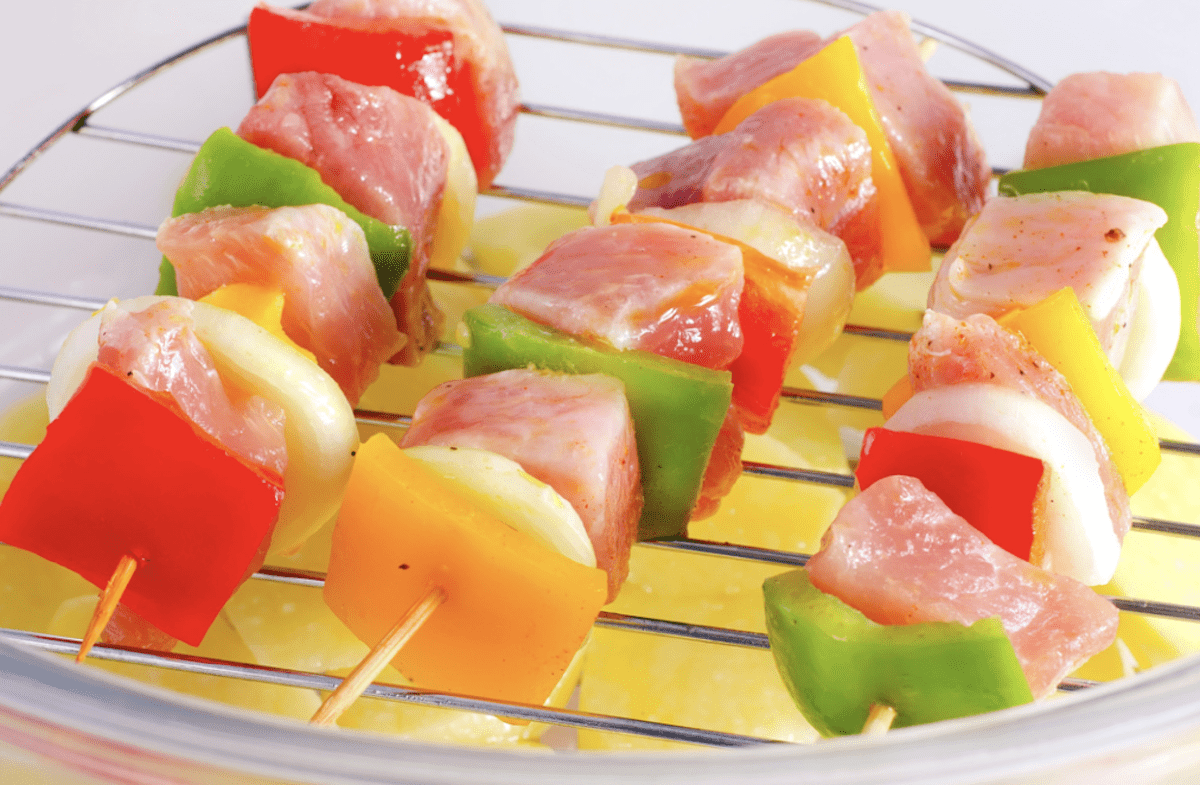
11. Skewer the meat and veggies on the bamboo skewers. You can put just meat on some and just vegetables on others or mix them together. Be sure to keep a good mix of meat and vegetables if on the same skewer by alternating the vegetables and meat.
12. Place finished skewers on the foil-lined baking sheet

13. Bake for 25 to 30 minutes, checking every 10 minutes and flipping the skewers over so they cook evenly and do not burn.
14. When ready, remove from the oven. You can leave it on the skewers and serve it with sides like rice, couscous, orzo or salad. Or remove from skewers and serve on a platter with rice, pita bread, and sauces of choice.

If you’re looking for more recipes like our easy chicken kebab recipe, check out our Gemista – Stuffed Vegetables and Shawarma or Gyros Pita.


Pin to your favorite recipe board on Pinterest

.  


banana bread


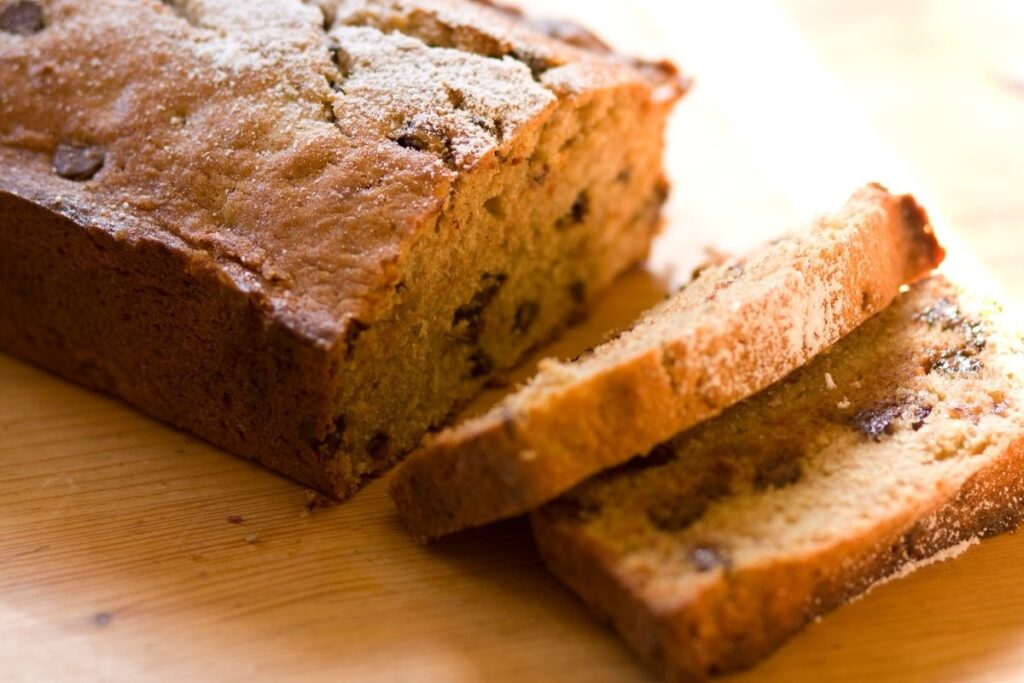
As you may already know, I am known not only for my tasty food but also for being the “messy gourmet.” This easy banana bread recipe is one that can be made in just a few bowls so it keeps clean up easy. I’ll walk you through the recipe and show you how flexible, easy and delicious this recipe is.

Banana Chocolate Chip Bread with Vanilla Buttercream Frosting

Ingredients

Banana Bread

1 stick (1/2 cup) butter, softened at room temperature
1 cup granulated sugar
2 large eggs
2 ripe bananas, mashed
1 1/4 cups all-purpose flour
3/4 teaspoon baking soda
1/2 teaspoon salt
1 cup semi-sweet chocolate chips

Vanilla Buttercream Frosting

1 stick (1/2 cup) butter, softened at room temperature
2-3 cups confectioner’s (powdered) sugar
3-4 Tablespoons heavy cream
1 teaspoon pure vanilla extract

Directions

Prepare the cake:

1. Preheat your oven to 350degrees F. Grease or spray with nonstick spray a loaf pan, glass if you have it.

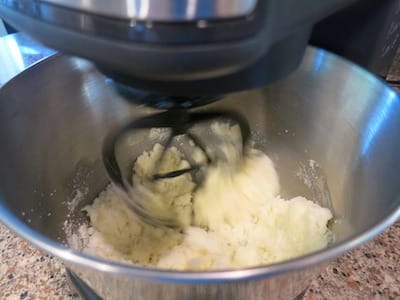
2. Using the paddle attachment, beat butter and sugar in a stand mixer until creamy and light.

Mix Butter and Sugar
Cream Butter and Sugar

3. Add eggs, one at a time, incorporating the first egg fully before adding the second.

4. Blend in mashed bananas.

banana chocolate chip

5. Sift flour, salt, and baking soda together into a medium bowl. Add dry ingredients to the stand mixer bowl with the banana mixture and blend until smooth and even.

6. Add chocolate chips and gently fold them into the batter.

7. Pour into greased pan and bake in preheated oven for about 45 minutes until a toothpick inserted in center comes out clean.

8. Remove from oven when golden and cooked through and let cool completely.

banana chocolate chip bread

While the bread is baking, prepare the frosting:

Change to whisk attachment on stand mixer:

1. In the stand mixing bowl and add butter, vanilla, heavy cream, and 1 cup of confectioner’s (powdered) sugar.

2. Start out at a slow speed and gradually combine ingredients. When combined add another cup of confectioner’s sugar.

3. Incorporate and whisk at a higher speed until light and fluffy. Add additional confectioner’s sugar if necessary to get consistency as fluffy as you like.

Put in refrigerator while cake cools.

Putting it all together:

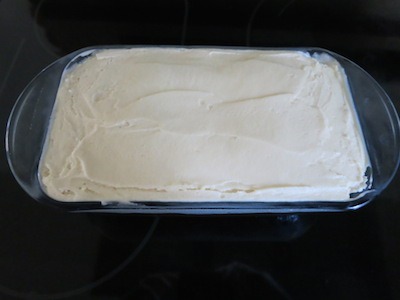
Remove frosting from the refrigerator and soften slightly until ready to spread easily. Frost cooled cake. If you like, you may remove it from the pan and frost sides as well.

Frost The Cake
Frost The Cake

This cake comes out great and has already been partially consumed. It’s also easy to use this recipe to make mini banana chocolate chip muffins or large size muffins. Whatever you bake with this recipe it also freezes very well. Just store slices or muffins separately and pop them out when you need them.

chocolate chip banana

Now, go make your own easy banana chocolate chip cake, muffins, loaf or mini-muffins. Grab a cup of coffee and slice and enjoy!

 Pin It For Later!

.

Zucchini Spaghetti

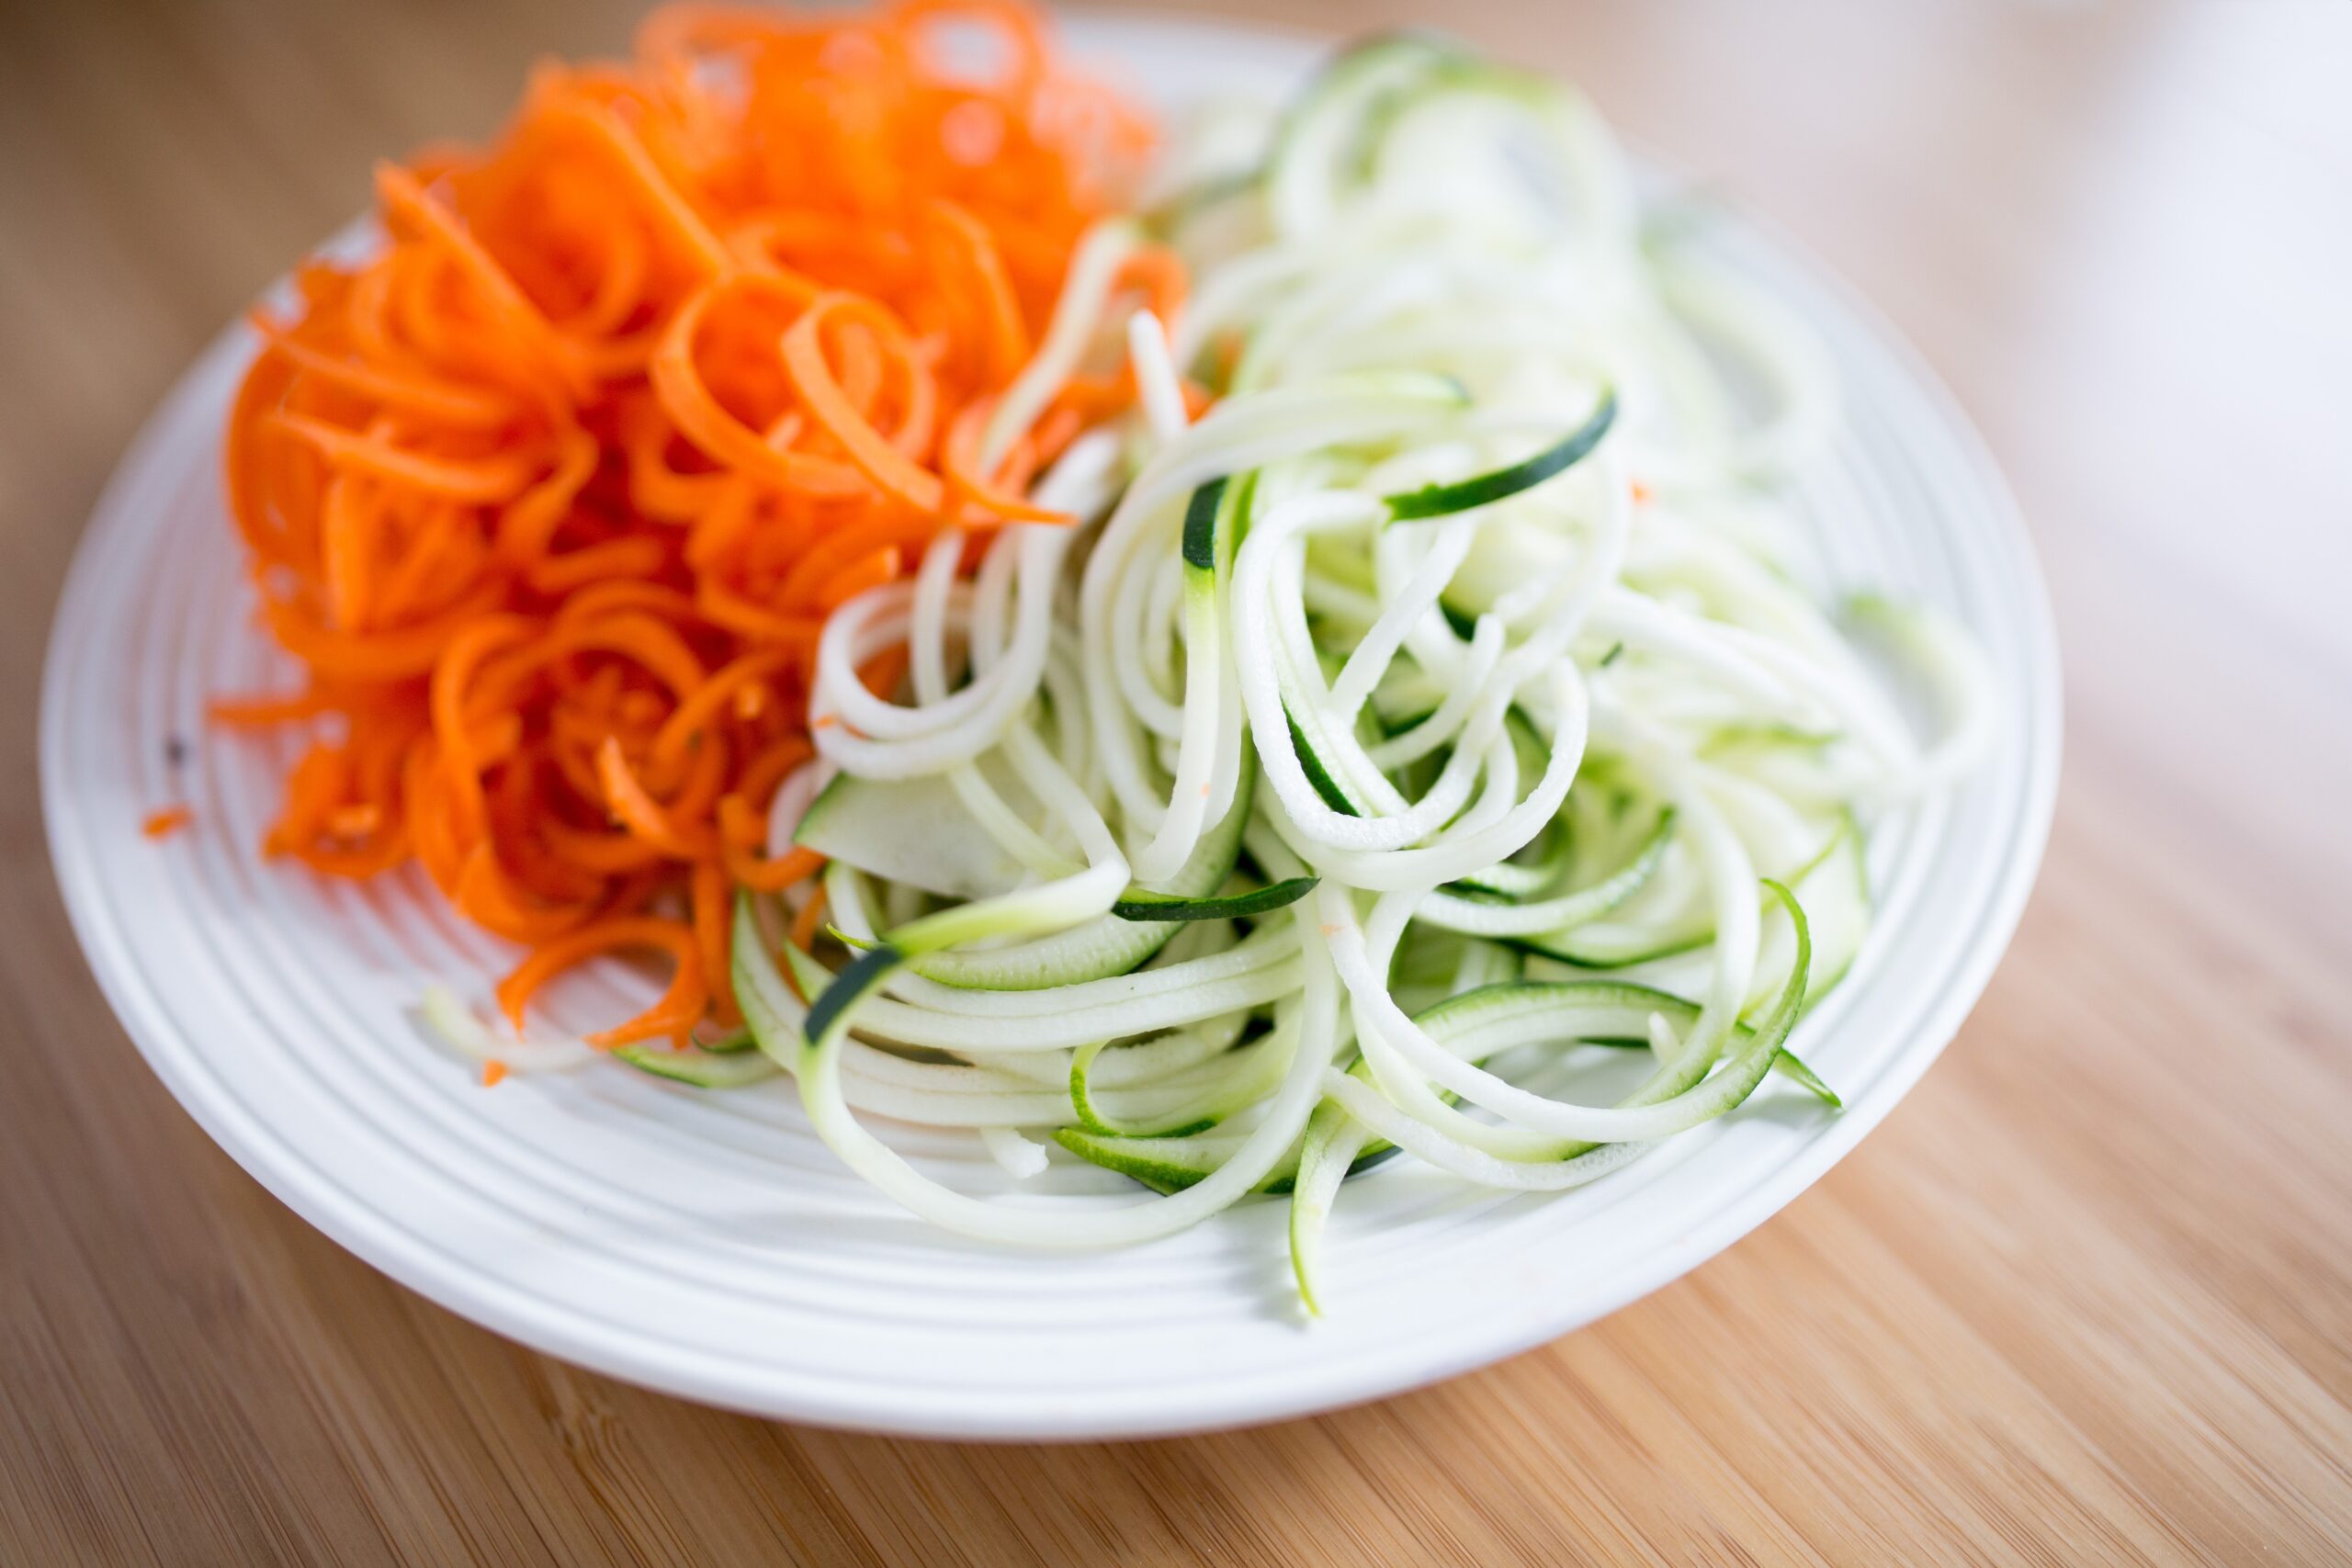
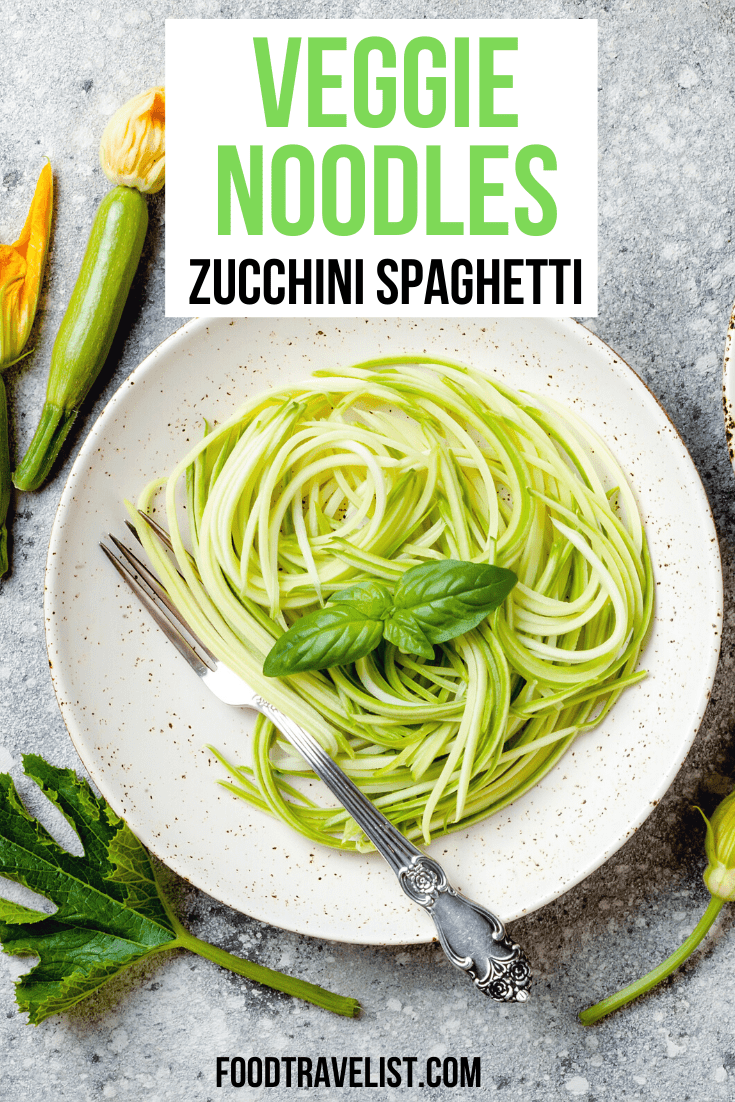
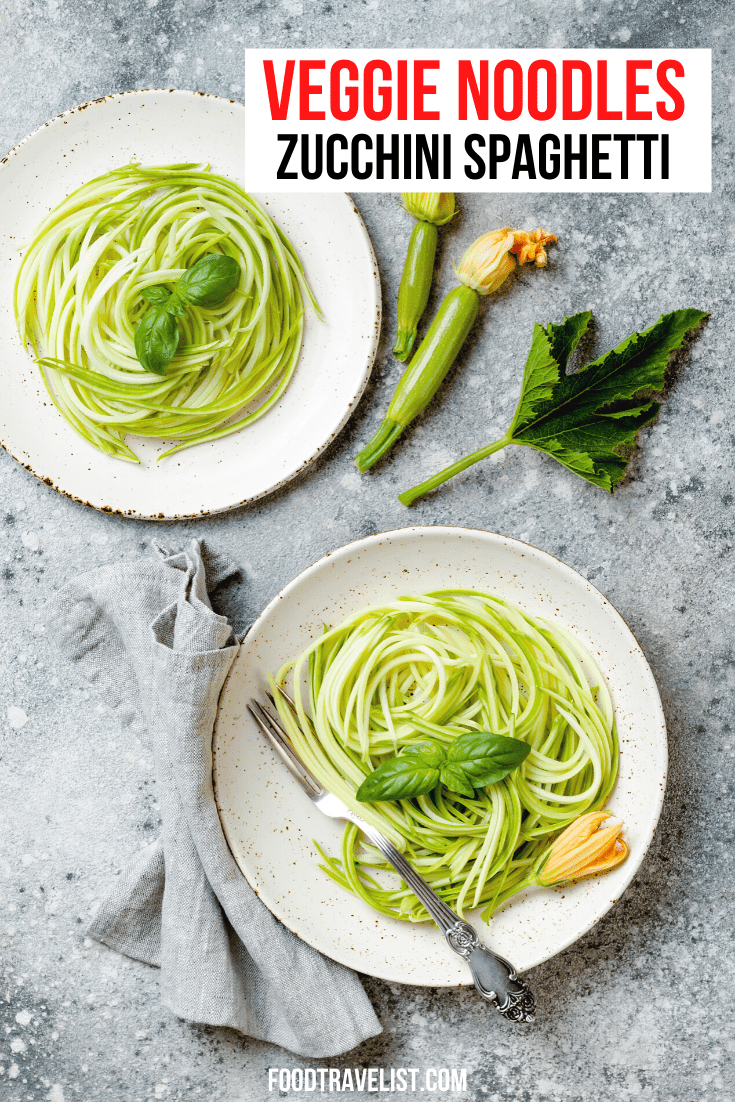
Veggie noodles like zucchini spaghetti are welcome any time of year. It’s especially good and abundant in the summer months. You may even find a giant zucchini in your own garden.

Veggie Noodles
Veggie Noodles


Flexibility Is Key

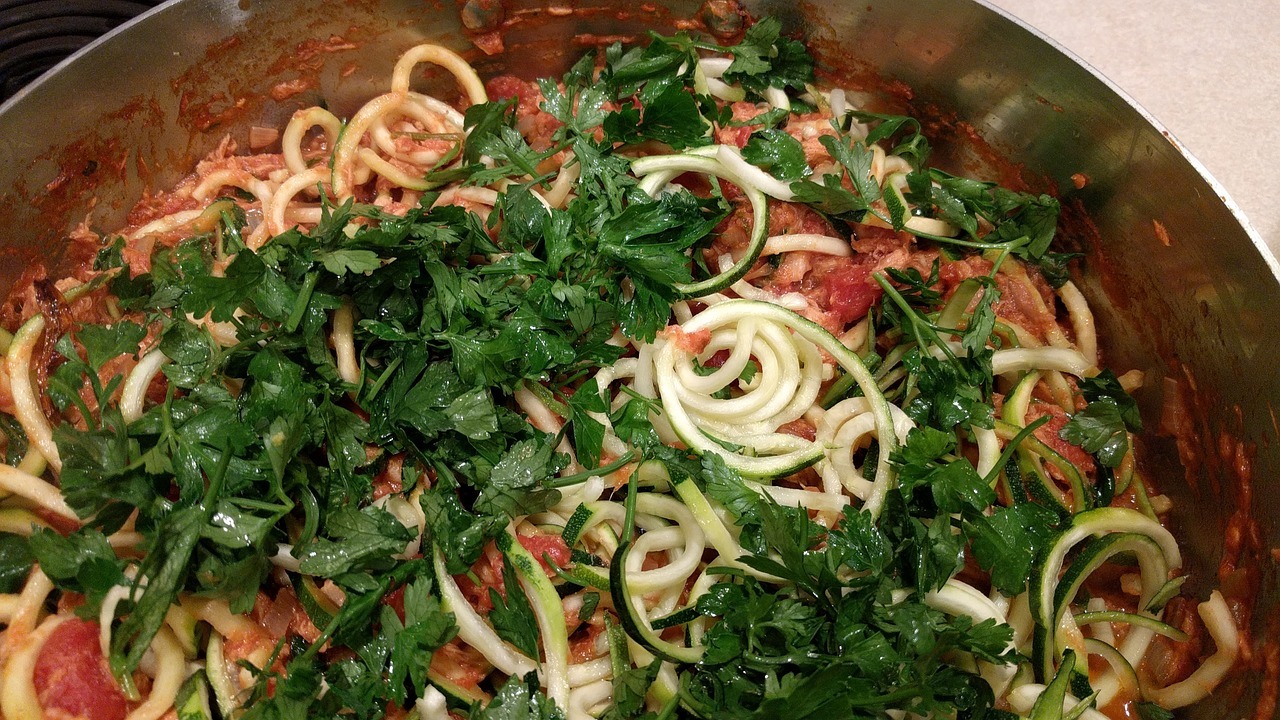
One of the best ways to get vitamins into a meal is through healthy vegetables. The good news is that preparing zucchini zoodles as they’ve been called is easy and can be prepared with just about any kind of sauce that your family enjoys. Making spaghetti with zucchini allows you to put some additional veggies and fiber in your diet. If you’re looking for a really unique and delicious recipe also try our healthy zucchini bread, too.


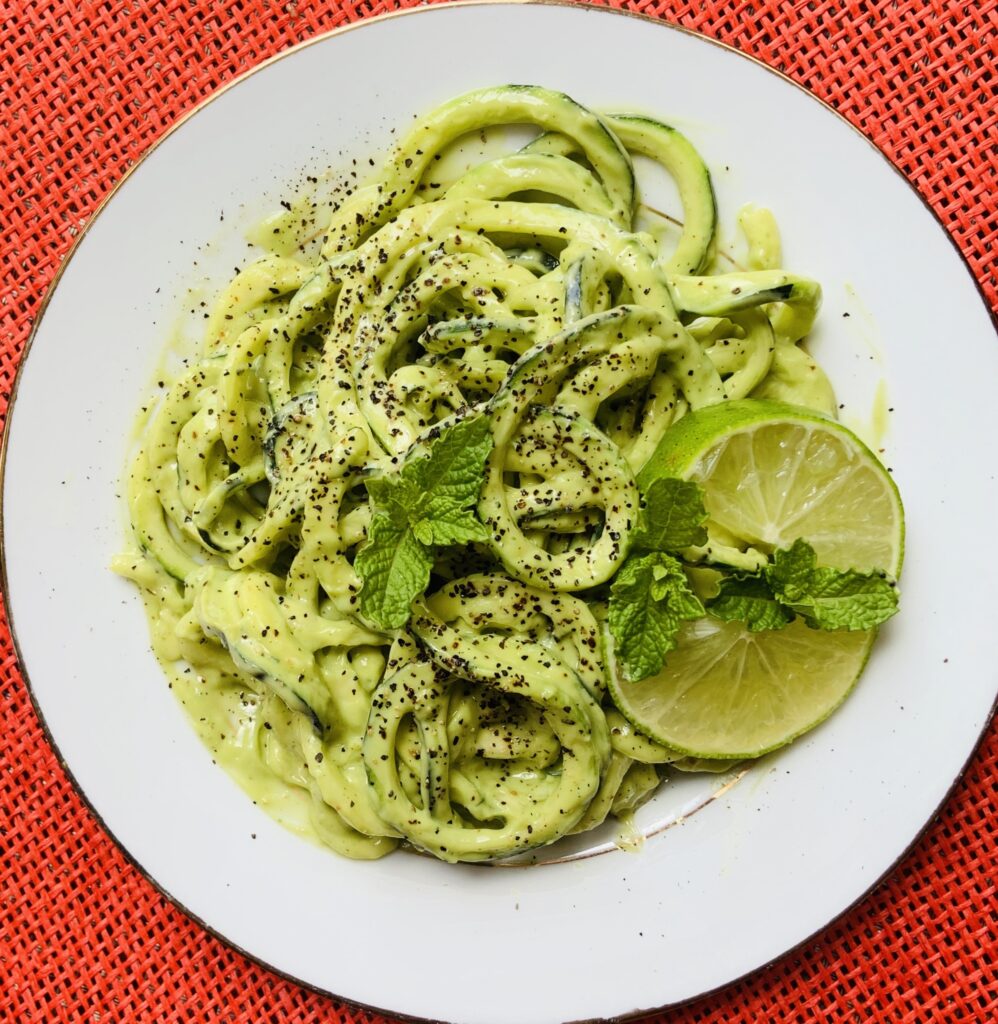
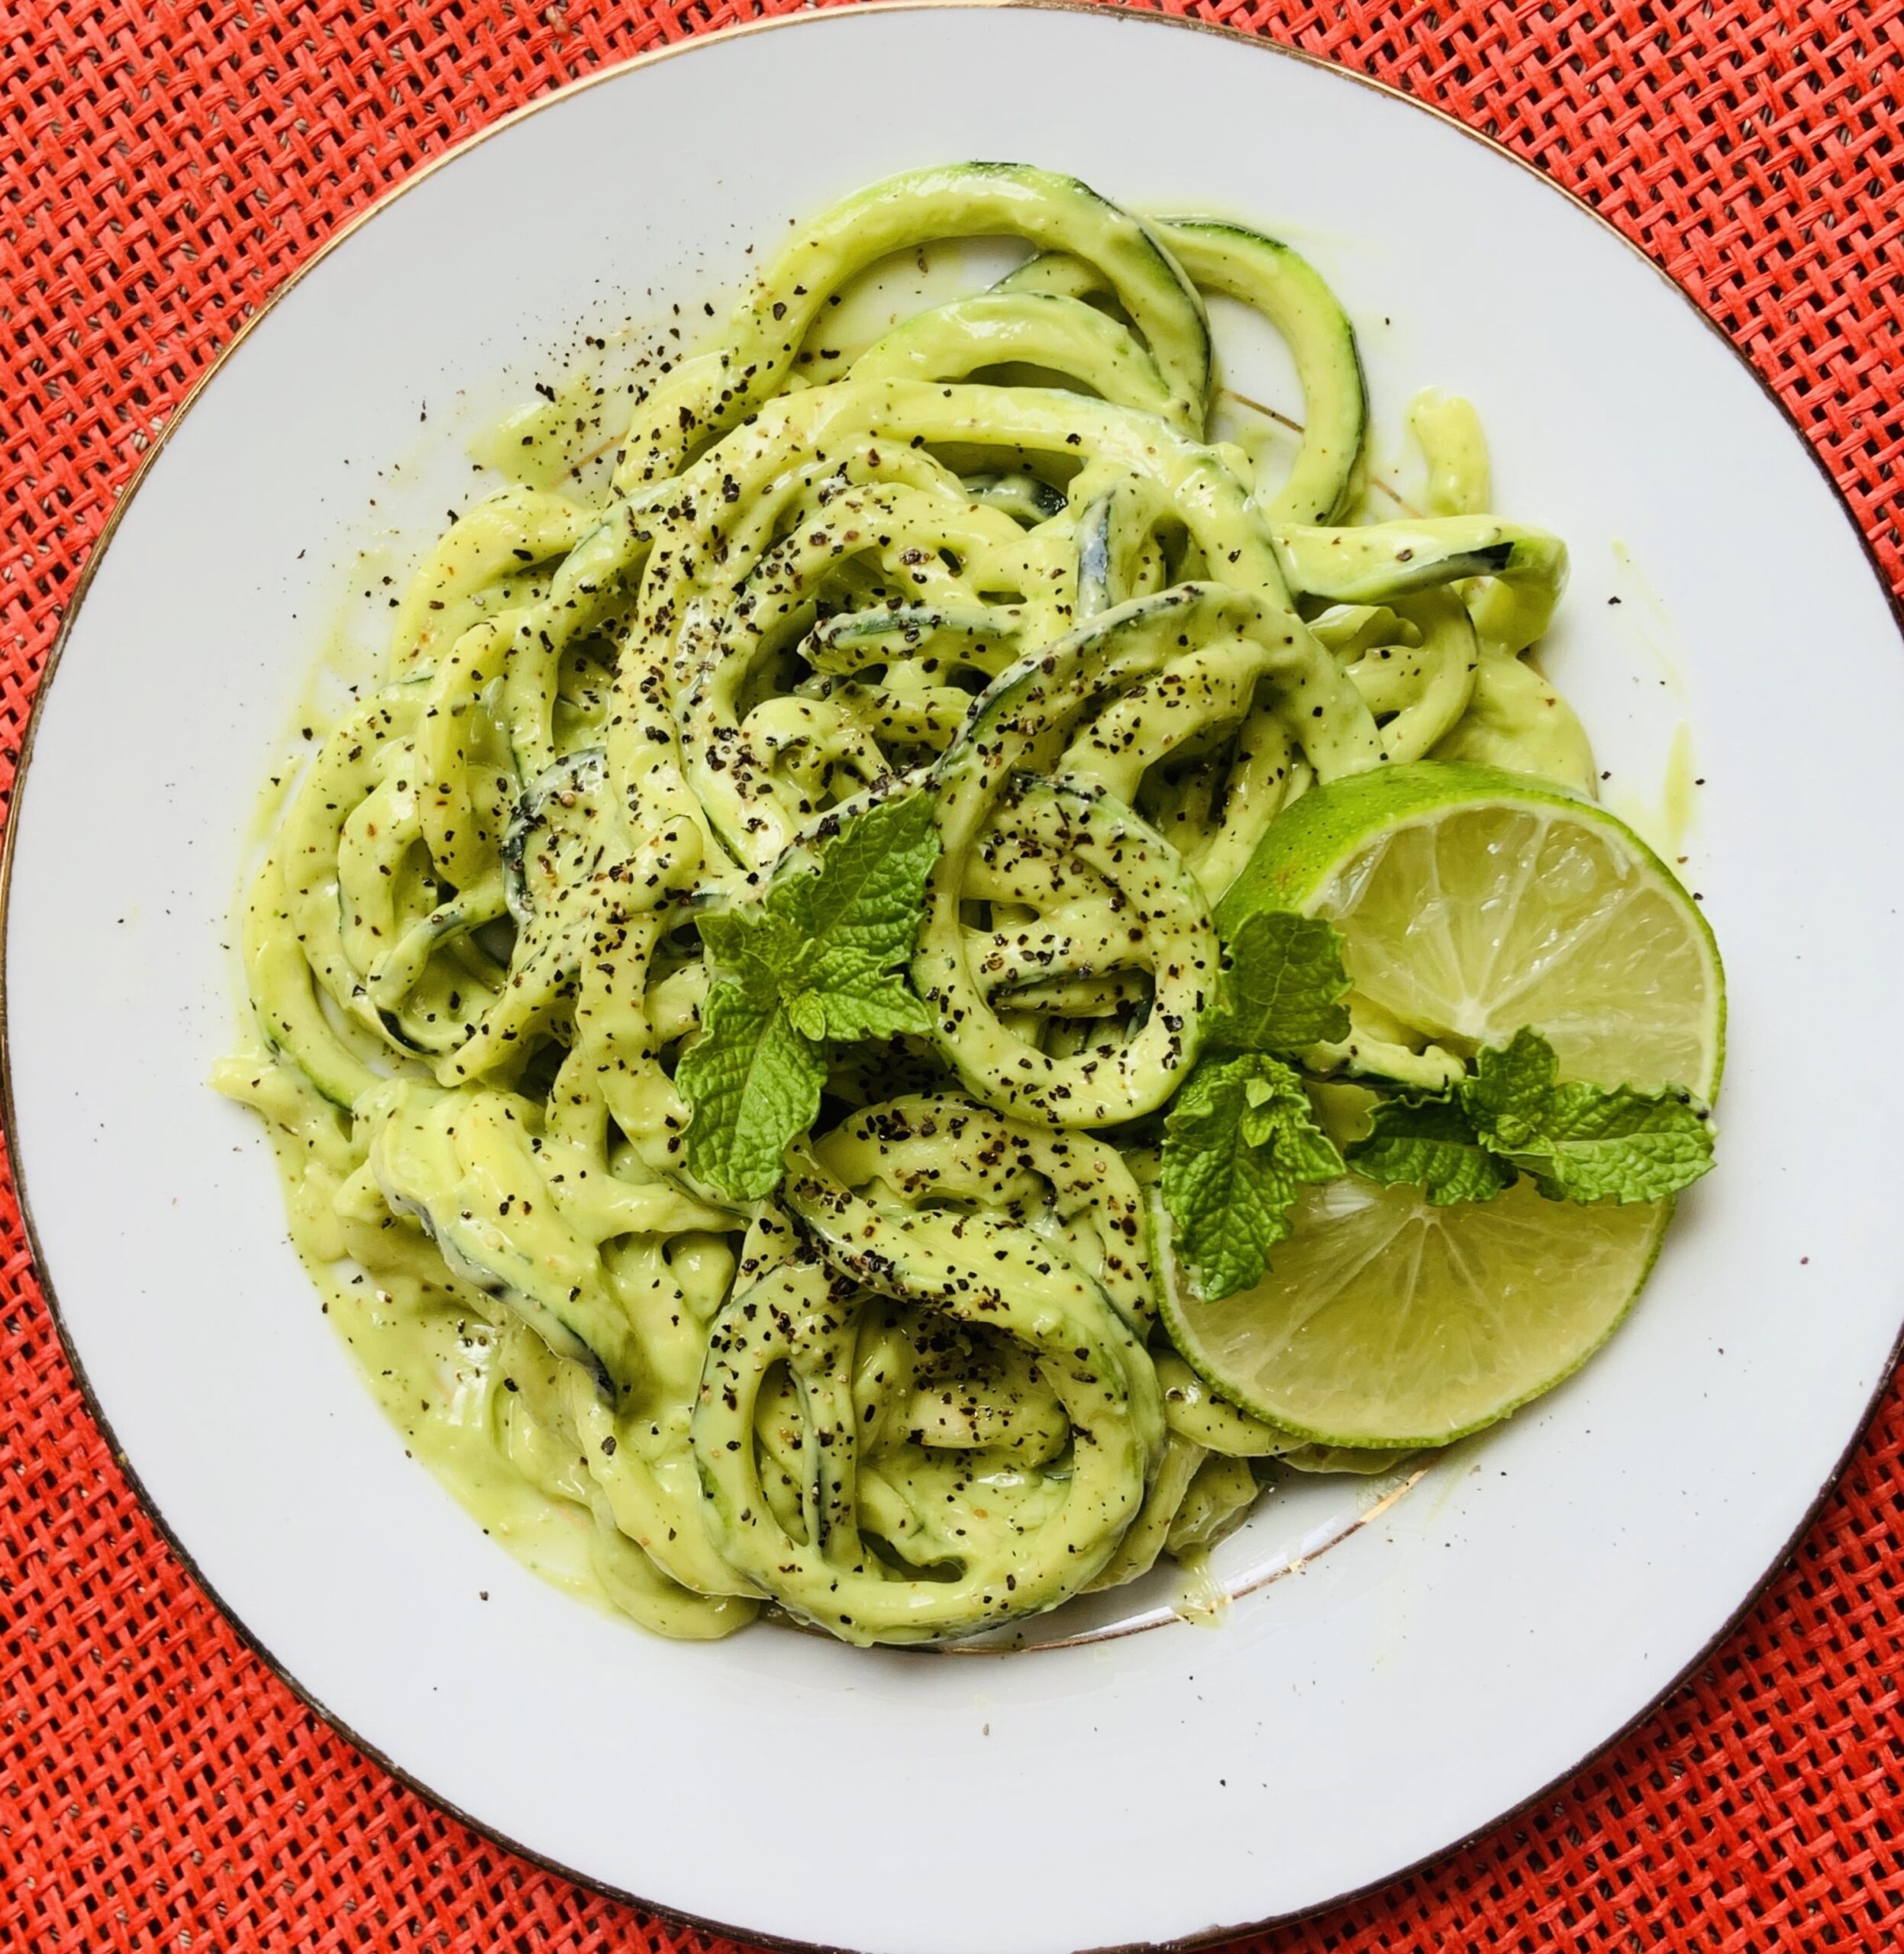
Lime Cream Zucchini Spaghetti

Veggie Noodles

Depending on what you have on hand, you can make delicious, nutritious veggie noodles like zucchini spaghetti, butternut squash fettuccini, or carrot or sweet potato linguine. We’ll make our spaghetti with zucchini in our recipe because we happen to have squash in the fridge that needs to be used.

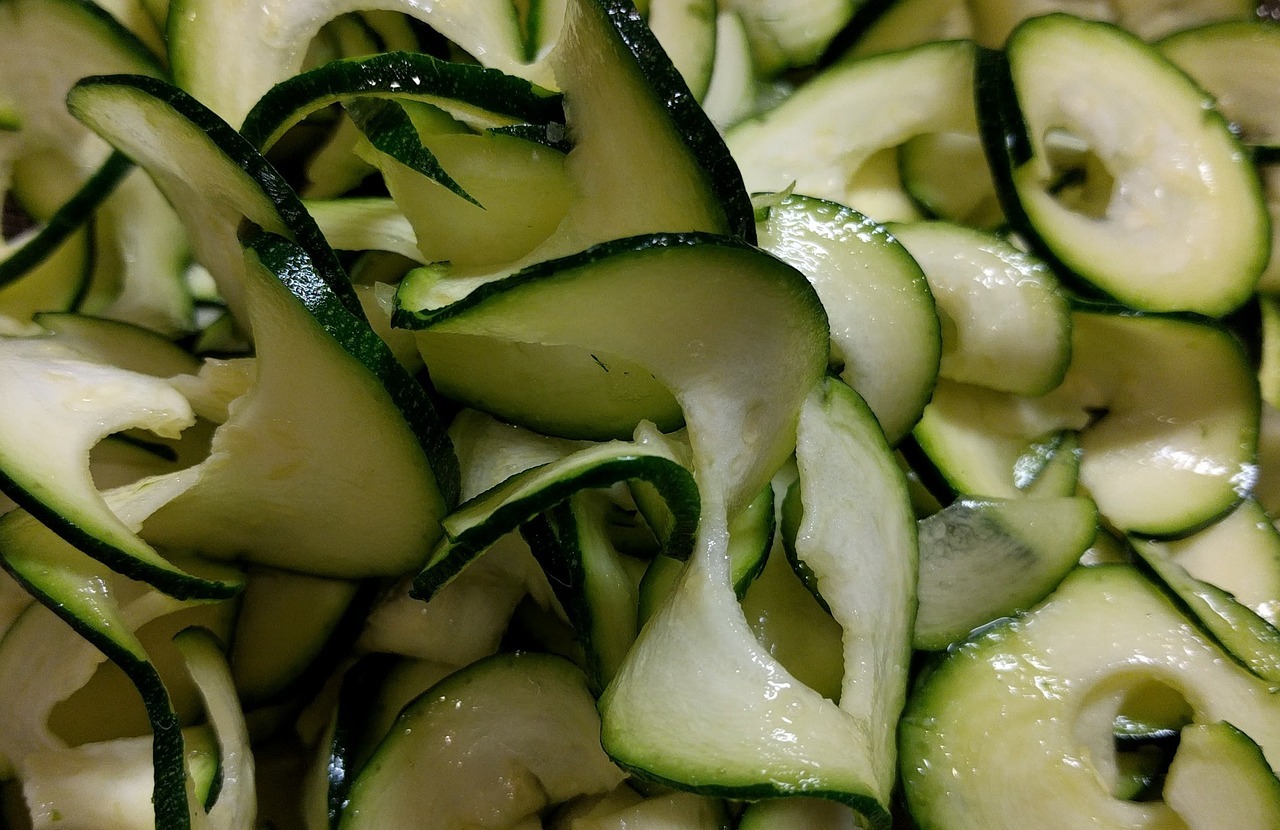
You can use a spiralizer if you have one, mandolin, julienne or plain vegetable peeler, or patience and a sharp knife. Cut your veggies into the shape and size you’d like or that you can easily manage. We’ll give you the process and some ideas of how to make vegetable noodles into a filling meal, which can be adjusted to the tastes and the ingredients you have on hand.


Zucchini Wide Noodles

Also, if you don’t have much in the way of fresh veggies or squash to use, you can mix in what you have with regular pasta to stretch it out and provide some texture. Remember, we’re here to give you ideas. Go with what you have and what you enjoy, using our recipes as guidance and to spark some ideas of your own. Here’s our version using the ingredients we have available.

Ingredients

1 large zucchini, julienned into long thin strips for veggie noodles
1/2 onion, cut in slices (you can use scallions, shallots, onions, or any color) If you don’t have fresh onions you can use 1 teaspoon dried minced onion or 1/2 teaspoon onion powder
1 clove garlic, minced (if you don’t have fresh garlic, you can use 1/4 teaspoon dried, minced, or powder instead)
1/2 lemon, juice, and grated peel (you can use any fresh citrus you like or 1 Tablespoon prepared citrus juice concentrate)
1 Tablespoon butter, unsalted
1 Tablespoon extra virgin olive oil
1/4 cup shredded Parmesan cheese
Fresh Italian parsley to garnish (or dried parsley, basil, or oregano)

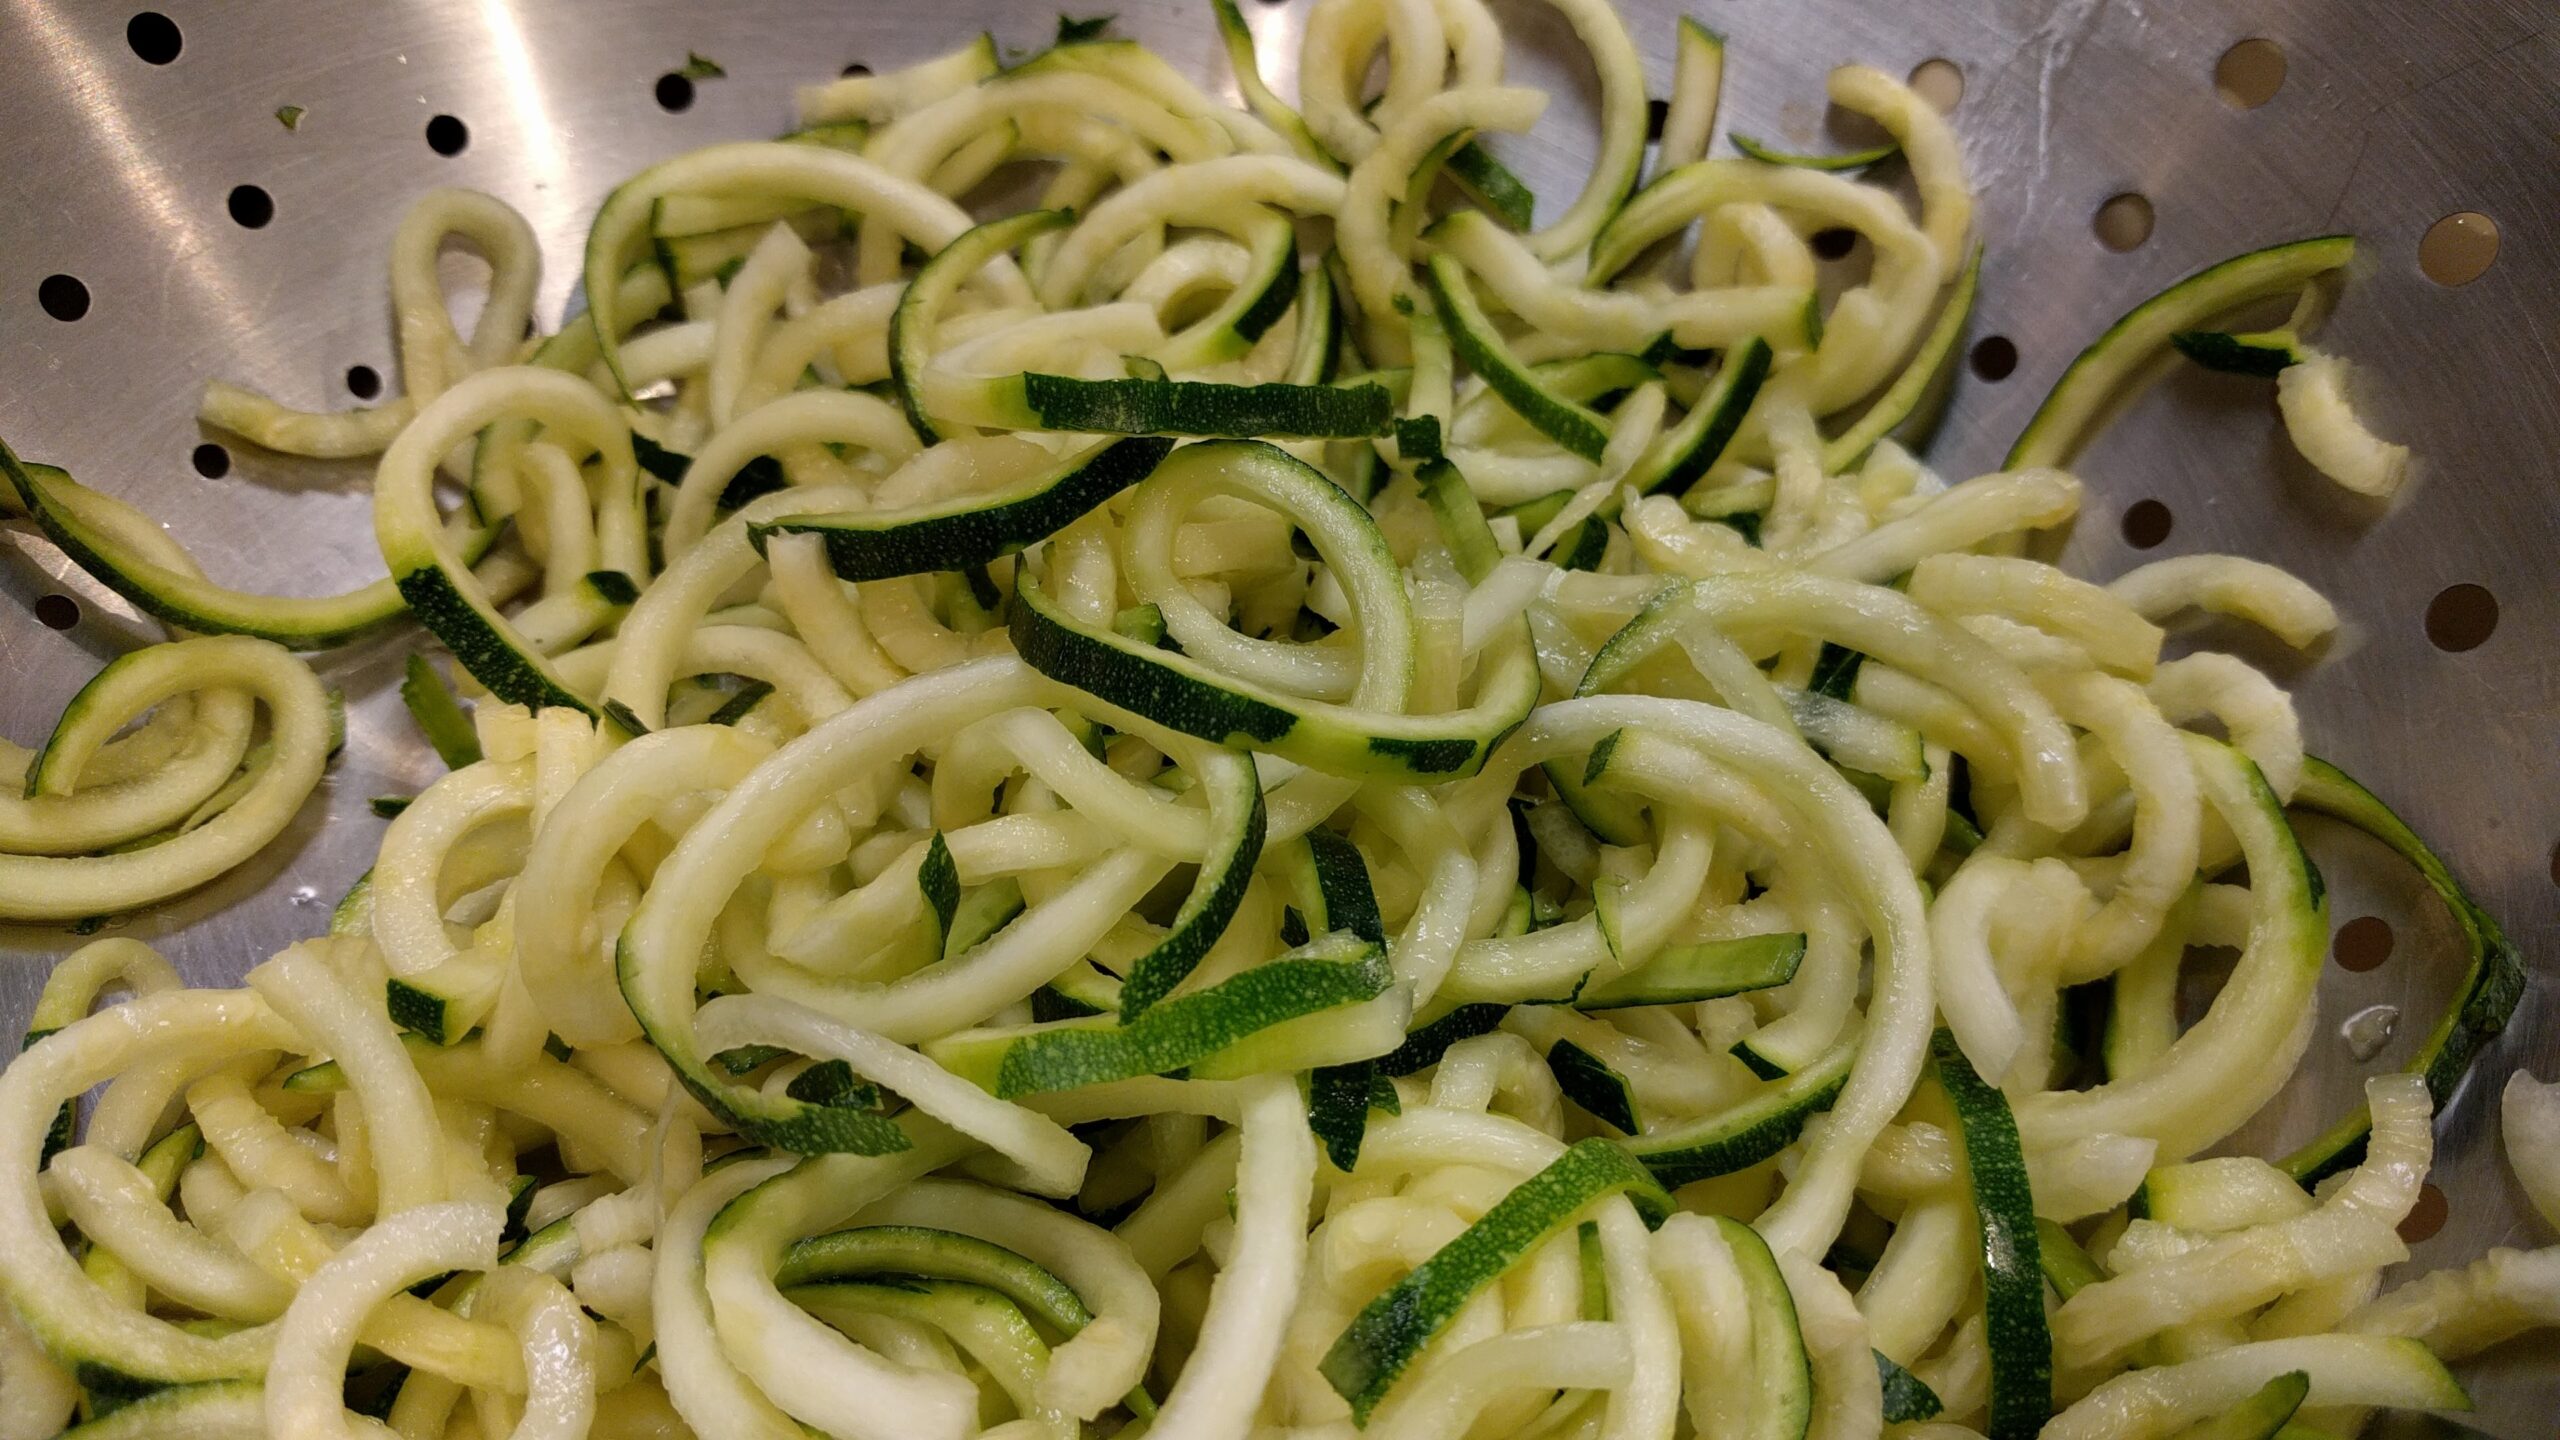
Zucchini Spaghetti
Zucchini Spaghetti

Directions

1. Use mandolin, peeler, spiralizer, or knife to cut zucchini into thin strips and place in a colander to drain excess liquid, if any.
2. Place butter and olive oil into skillet and heat over medium until melted and sizzling.
3. Add lemon juice, stir in onions and cook to soften.
4. Put minced garlic in and stir to heat for 1 minute.
5. Add veggie strips and stir to coat. Let cook until veggie noodles are soft and cooked through.
6. Place vegetable noodles in a bowl and sprinkle with grated Parmesan cheese and grated lemon peel.
7. Toss and then place on serving plates.
8. Garnish with fresh Italian parsley or dried herbs. Serve immediately.

Zucchini Spaghetti Italian Style

This zucchini spaghetti can become butternut fettuccini, carrot linguine, or any other vegetable noodle.  You can use your imagination to make a delicious tomato-based sauce or creamy lime sauce. You can even use them cold and sprinkle them with fruit or raw veggies and a hard-boiled egg. Add some roasted chicken or shrimp. The choice is up to you. Serve with a little garlic toast if you like. Best of all, it can all be done with a little planning in around 15 minutes or less.

We hope you enjoy this recipe. Let us know what spin you put on the recipe to make it your own.


                                             Pin to your Pantry Cooking board on Pinterest


UPDATE: Due to the pandemic, Vienna Beef now offers Hot Dog University virtually! Check out their website for all the latest details. 

If you’re anywhere in the midwest, you probably know the name Vienna Beef. It’s synonymous with the best-tasting hot dogs you’ll find in restaurants, shacks, food trucks, and carts all over. That’s especially true in hot dog crazy Chicago, the city that Vienna Beef franks call home.

Vienna Hot Dog Stand in Chicago

Beyond just eating hot dogs though have you ever seen one of those carts where people stand lined up waiting to buy their delicious street meat? Have you ever thought you would have fun selling hot dogs from your own hot dog cart with a breeze in your hair instead of sitting at your desk staring at a computer all day? Well, if you’ve got an entrepreneurial itch, but are not sure about the risk, listen up. Vienna Beef has something super special that might just interest you.

Vintage Vienna Beef Sign

Vienna Beef Presents Hot Dog University

That’s right. You can attend a course that will teach you everything you need to know to start your own entrepreneurial hot dog venture. We were invited to take the day and a half course as their guest at Hot Dog University and let us tell you, we learned more than we could have imagined!

Hot Dog uNiversity Vienna Beef Chicago
Hot Dog University Vienna Chicago

Professor Mark Reitman

We originally met our instructor at the National Restaurant Association trade show by the Vienna Beef booth. He informed us that they proudly served over 16,000 hot dogs to attendees of the show that weekend. That amazed us and we got to talking about the popularity of hot dogs in Chicago and elsewhere. He then explained that he is a PhD (Professor of Hot Dogs), having combined forces of his course in hot dog entrepreneurship with Vienna Beef to create the winning combination that is Hot Dog University. Over 1400 students have graduated from the program.

Diana Laskaris and Mark Reitman from Vienna Beef

Hot Dog Entrepreneurs Welcome

With dreams of running everything from a small hot dog cart to multi-venue hot dog restaurants, students come to the course with varying degrees of experience and knowledge in both hot dogs and business. The best thing about the curriculum is that it begins at the beginning and provides the fundamental information you need to run an entrepreneurial venture. After getting the basics down, we learned specific details relevant to success in the world of hot dog vending. Our professor shared many inside secrets he has learned from decades of experience with his own successful hot dog businesses.

Day 1 – The Hot Dog Business

Hot Dog 101

On the first day of the course, students receive a course manual with all the information you’ll need to start your hot dog business. No stone is left unturned. He covered economics, permits and licenses, food safety and handling requirements, how to select a cart, pricing strategies, and much, much more. We even got to ask the question, what is a traditional Chicago Hot Dog?

We got to have breakfast, and by breakfast, we mean a fully loaded sausage handmade by our Professor, in the Vienna Beef Factory Store & Cafe and watching him in action was so much fun. He even taught us an insider tip. To caramelize onions quickly, pour a little Coca-Cola on them.

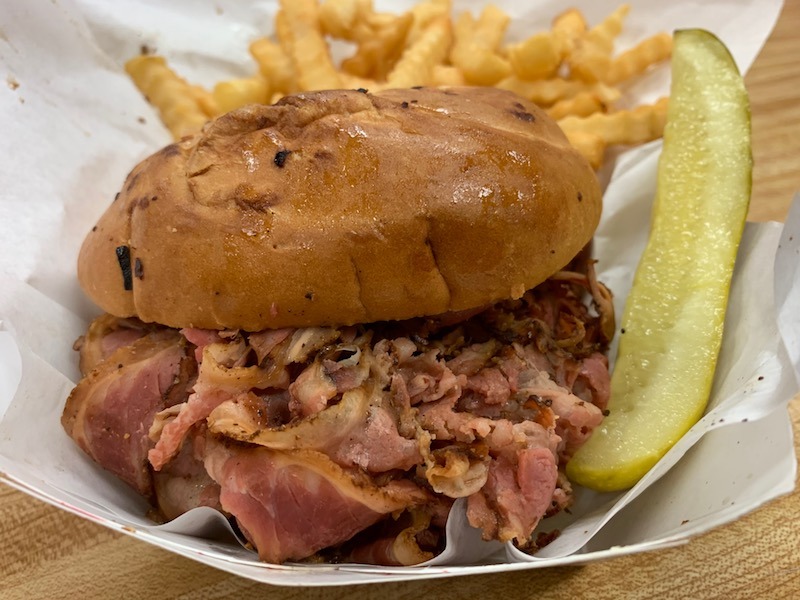
It was great to see that Vienna Beef offers a lot more than hot dogs too. Pastrami, corned beef, Italian beef, turkey breast pastrami, salami, soups, chili, condiments, and more. They even have a huge pickle business!

Hot pastrami sandwich at Vienna Beef

The Proof Is In The Product

We learned about the different styles, sizes, and properties of the products we would be in business to sell. Did you know that a Polish Sausage is a hot dog that has different spicing and a larger grind meat? We didn’t! Different types of casings and even skinless dogs of different widths and lengths provide more options. We had no idea. We learned about condiments, packaging, marketing, and how to run a tight ship, er, cart. And, if we decided to start a hot dog business, Vienna Beef and Hot Dog University would help us succeed. Students can get help with product selection, buying a cart, and anything else. Vienna Beef wants to give students every chance of success.

Sausages are king at Vienna Beef

Meet The Pros

Part of the fun in learning about any new venture is meeting successful people in the business. We had the opportunity to meet some of the top executives in marketing and management at Vienna Beef. We also got to meet with people who had run successful hot dog businesses. Of course, our PhD Mark Reitman had huge success with his hot dog cart, so much so that we even got to use it for our training on Day 2! We also met Bill Murphy, proprietor of the much loved Murphy’s Red Hots, which was a Chicago institution for over 30 years.

Bill Murphy Hot Dog Specialist

Day 2 – Practical Application

Smart Shopping

What we learned about building a successful hot dog stand business on the first day became real on the second. We visited a restaurant supply warehouse that carries just about everything we would need to stock our supplies. We learned which napkin dispenser is best (one that only allows one napkin out at a time to prevent waste). Our intrepid professor showed us everything from which condiment dispensers are best to which soft drinks to sell where. He taught us that saving a few pennies here and there would add up to the difference between making a profit or going under.

If You Build Them, They Will Come

The ultimate test came when we got practical experience in building the famous Chicago Dog from scratch. We got our condiments in order and learned how to steam the buns just right. After that, we had to get the water temperature correct for the dogs and learned how to prevent them from getting dried out or overcooked. Importantly, Vienna Beef has perfected Chicago’s Hot Dog, so we needed to be perfect in our execution. The challenge is that if you can imagine making them quickly for an imaginary crowd without getting anything messed up! We did our best and, as they say, to the winner go the spoils.

What Does It Mean To Order Your Hot Dog Chicago Style?

So what’s on a Chicago Hot Dog? You have to start with a Vienna all-beef hot dog and a Rosen poppy seed bun then top with mustard, bright green relish, chopped onions, tomato wedges, pickle spear, and two-sport peppers, then shake on a dash of celery salt. If you’re from the south side of Chicago you might want to add a few slices of fresh cucumber too.

The Classic Chicago Hot Dog from Vienna Beef

Graduation Ceremony

Our proud accomplishments and full bellies led us to one place – graduation! We were honored to receive Vienna Beef t-shirts and other swag. But most important were the diplomas we received. They put us among the elite few who have been certified worthy graduates of Hot Dog University. When we hear the call of entrepreneurship, you can bet we’ll get back in touch with our PhD friend to get the latest tips on creating the best darn hot dog cart you’ve ever seen!

Host A Hot Dog Party Of Your Own

Although we live within shouting range of Vienna Beef’s home base, we know that there are people all over who would love to have a true Chicago Dog. Fortunately, Vienna Beef has a robust online shop, where you can order their authentic products. Whether you want to set up a tailgate, host a big backyard grilling party, send some tasty treats to a friend or just get some “weenie wear,” they’ve got you covered. They have complete kits as well as individual products. And we know several people who simply will not eat their Chicago Dog unless it has the real deal bright green relish. No substitutes are accepted!

Recipes And Ideas

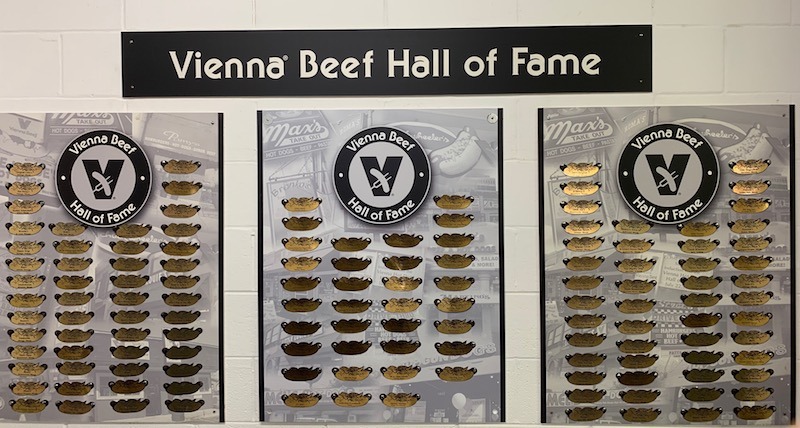
Whether you want to learn the art of the cart to start a new business or just want to learn how to make the best darn dog in the world, Vienna Beef has lots to share. After 125 years of business, it’s fair to say they know what they’re doing. Have some fun checking out who the latest additions are to their Hot Dog Hall of Fame. Or get some new ideas on how to make new hot dog creations to surprise and delight your guests.

Vienna Beef Hall of Fame

Fun And Tradition

We really did have fun at our Hot Dog University training course. Professor Reitman not only entertained us but also provided a lot of practical information about how to actually run a successful hot dog business. Vienna Beef has a long tradition of excellence and the executives we met enjoy their work as well as honor the history that is an important part of midwest culinary culture. If you’re a history buff, you’ll also love the Vienna Beef History Museum that has been opened inside the factory.

You’ll find vintage photographs, marketing materials, and other memorabilia. Did you know that the hot dog was introduced at the Chicago World’s Fair in 1893? And did you know that the founders of Vienna Beef, Austrian-Hungarian immigrants sold them in Old Vienna” on the Midway, also known as the Austrian Village? Well, they did. And now you know why the company is called “Vienna” Beef!

Vienna Vintage Signage

Whether you have an entrepreneurial urge or just want to enjoy Chicago’s Hot Dog straight from the source, Vienna Beef offers opportunities for having fun, enjoying great tastes, and learning about the realities of starting a hot dog business. We had a great time and will wear our Classic Vienna Beef Chicago’s Hot Dog t-shirts with pride.

Pin it for your Hot Dog Dreams on Pinterest

Updated July 2021

I Really Need To Prevent Mosquito Bites

Mosquito repellent spray is a necessity for me. I have a horrible mosquito bit allergy. For me, they’re not just a pesky annoyance that causes some tenderness and itching, maybe a little swelling that goes down in a day or two. No, no. I’m one of the lucky ones with what’s called “Skeeter Syndrome.” This means that my reaction to a mosquito bit runs to the extreme. One bite will make the affected area blow up like a water balloon. It will be an uncontrollable combination of itching and burning that is nearly impossible to quell even with strong antihistamines both topical and internal. It can include fever, nausea, headache, and pain in other parts of my body that are not even part of the bite. One bite can put me in bed for a week.

Nasty Mosquito
Nasty Mosquito

So when I say that I have searched high and low and tried literally every mosquito repellant spray on the market, I am not kidding. But not just the sprays. I’ve tried lotions, infrared lights and insecticide fans, bracelets, shields, pills, natural products, chemical compounds, you name it. Some have worked a little. But only one has worked a lot. Permethrin Insect Repellant.

Disclaimer: We were sent samples of Sawyer Insect Repellent. The review contains our honest opinion based on our experience with Sawyer’s products

Mosquito Spray For Yard

I actually discovered it before we went on a trip to Cuba. We had a company spray a boundary around the outdoor areas at our home and yard and they guaranteed that we would have no mosquitoes for 4 weeks. They would come again during that time for 3 or 4 times and mosquito spray for yard safety. Finally, I could sit outside during the summer without being in a constant state of panic. They sprayed, I watched, I waited, I had others go outside to test for me, and guess what? No mosquitoes! I was in heaven. I could go outside with the real people, play in the pool, and have dinner on the patio. It was a gift.

Permethrin Spray

I asked the people at the service what exactly they had used. They told me it was called Permethrin. How it works is amazing in a lot of ways. Permethrin is a synthetic version of the natural insect repellent pyrethrin that is found in the Chrysanthemum flower. It also is low in toxicity to birds, which, as avid bird watchers, was important to us.

Sawyer Permethrin Spray
Sawyer Permethrin Spray photo courtesy of Sawyer.com

Sawyer Permethrin

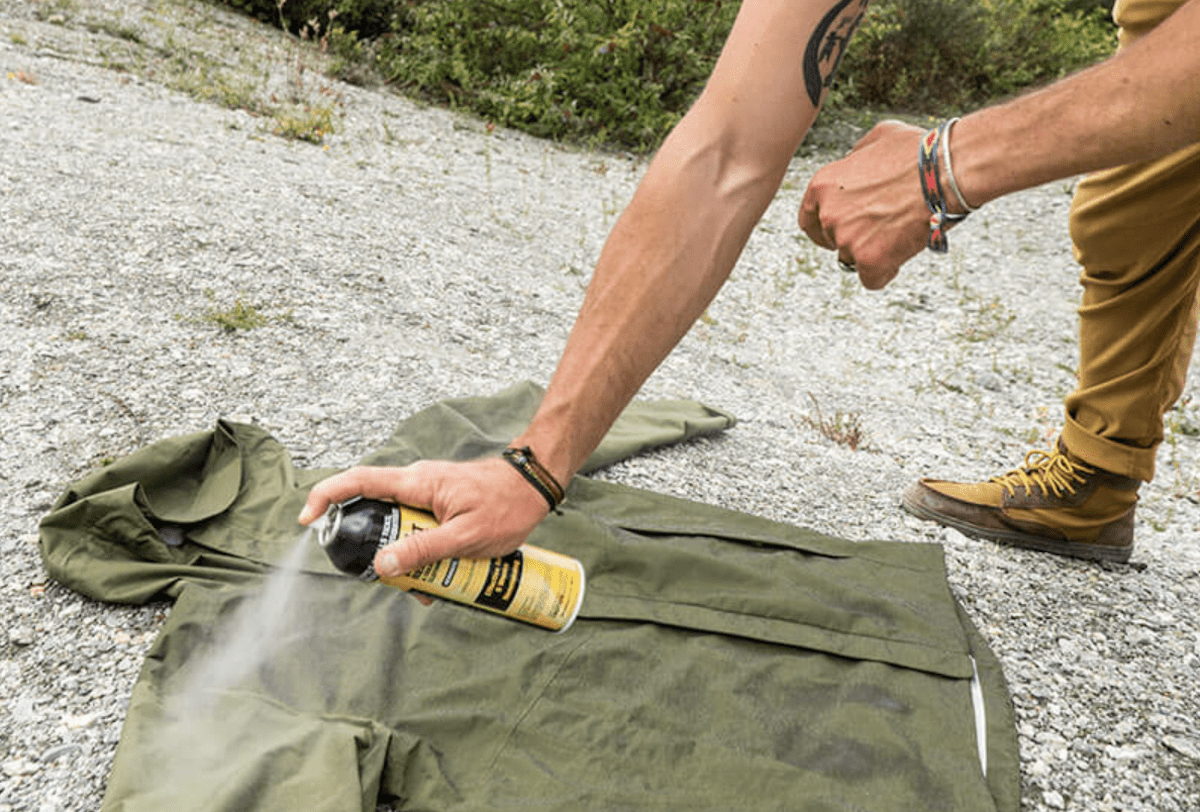
Once I discovered the magic ingredient, I discovered that Sawyer had a Permethrin spray consumer product that you could use to spray on your clothing, backpack or travel bag, and travel gear. You can even spray it on outside stuff like fabric patio furniture, table cloths, or even a hammock. You don’t spray it on your skin.

We were heading on a trip to Cuba in August when the mosquitoes were most active and Zika Virus and Dengue Fever transmitted by certain types of mosquitoes prevalent in the area were a concern. I wanted desperately to go to Cuba, mosquitoes notwithstanding, so I got a big bottle of Sawyer Permethrin insect repellent spray and loaded up my bag with Benedryl and various other sprays and potions, and hoped for the best.

When we arrived at each new hotel, I would spray the perimeter of the room with Sawyer Permethrin spray. I would spray my bed before we left for the day and sprayed my clothing, bag, and any accessories I’d be putting on me. At the time I only had Off wipes, so I used those on what the parts of me that were exposed, which was ultimately limited to my face and hands. Even though it was hot, I am used to wearing long sleeves and long pants. I’d rather be hot than bug-bitten.

The trip to Cuba was amazing. We even brought back a fantastic recipe for Traditional Cuban Rice Moros y Cristianos. What we didn’t bring back, specifically, what I didn’t experience during the entire trip, was a single mosquito bite. Not one. It was incredible. I felt like Wonder Woman. I have used Sawyer Permethrin ever since.

Spray Sawyer Permethrin On Clothes And Gear
Spray Sawyer Permethrin On Clothes And Gear photo courtesy of Sawyer.com

Picaridin – What’s That?

And when Sawyer asked if we’d be interested in testing their products, I already knew I was a Permethrin fan. And, it still works as well as ever. What I didn’t have back in my Cuba days and what is so valuable to have now is another product that you can actually use on your skin. Sawyer Picaridin insect repellant comes in various forms such as a continuous spray, spray pump, and lotions. You can buy them in compact travel sizes like four or six ounces, or you can get a quart or gallon dispensing jug that you can use for refilling, which is great if you’re like me and want to be protected all summer long.

Sawyer Picaridin Products
Sawyer Picaridin Products photo courtesy of Sawyer.com

Picaridin is slightly different than Permethrin. It’s an effective alternative to DEET, which was just about the only other product that ever worked for me. When you look at permethrin vs DEET, which also has some health considerations, Sawyer’s repellent Picaridin is safe for the whole family, including children as young as six months, and even pregnant women. In fact, it’s the Public Health Agency of Canada’s first choice for kids.

Safe For Kids
Safe For Kids photo courtesy of Sawyer.com

Sawyer Insect Repellant Lasts A Long Time

While Sawyer Permethrin will last up to six weeks on fabrics and outdoor items, Sawyer Picaridin is designed for you to use daily. They also have specifications that tell you how long it will last. For instance, Picaridin spray lasts for up to 12 hours against mosquitoes and ticks. If you use the lotion, you can get up to 14 hours of protection. If you’re looking to avoid bites from other insects like gnats, chiggers, sand flies, and biting flies, both spray and lotion will protect you for up to eight hours. That means you can spend a day outdoors without having to reapply every couple of hours.

It’s also good to know that the products are not greasy so they won’t leave an oily stain. You can also use it on your clothes, backpack, accessories and it won’t damage anything. It has a nice mild citrus scent that pretty much evaporates when it dries.

Permethrin Spray Is Safe For Dogs

If you like to take your dog along with you on outdoor adventures, you may want to protect Fido from nasty insect bites too. Sawyer Permethrin works great for dogs, helping to control mosquitoes and fleas for 35 days and ticks for up to six weeks. Even if you just have a rover who loves to rove, it’s good to know you can protect him or her.

Sawyer Permethrin Is Safe For Dogs Too
Sawyer Permethrin Is Safe For Dogs photo courtesy of Sawyer.com

Best Mosquito Repellent Spray

So for me, this is a game-changer. Now I can actually protect my clothes, my shoes, my bag, whatever I want as well as my own skin. If I want to go lie outside in the sun for a bit, I can. If I want to go for a long walk in the park, even at sunset when the mosquitoes are most active, and not have to hold my breath and hope for the best. Whether I want to protect something for a long time, like a backyard furniture set, or a short time, my body on a walk, there’s something I can count on to keep me safe. Literally, it makes me into a whole different person when I don’t have to be concerned with getting a mosquito bite.

Easy To Buy, Good To Support

The best thing about Sawyer’s Permethrin and Picaridin products is that they are now readily available. You can find them at Amazon.com as well as retailers like Dick’s Sporting Goods, Bass Pro Shops, REI Co-op, Menards, Moosejaw, Walmart, Cabela’s, and others. Sawyer also makes water filters, sunscreens, and first aid equipment which is all great for world travelers or stay-at-home adventurers, too.

Sawyer Products also are respectful of its place in the world. They help protect people when they travel through their products. But as they say, “We are an American outdoor gear company…with a mission. We want to help change the world”. Check out Sawyer International to learn how they are bringing clean water to developing countries using Sawyer water filters and how you can help too.

Enjoy Your Outdoor Dining Again

Enjoy The Outdoors Again

I know it’s not a fun and sexy thing to talk about mosquito bites. Not everyone needs to arm themselves with mosquito repellent spray as much as I do. But if you do, or if you’re just someone who wants to make your friends and family more comfortable without nasty flying things around the yard during mosquito weather, then you are really going to love Sawyer’s Permethrin and Picaridin and want to have them around wherever you are and wherever you go. That’s what I do now, and it really makes a difference. I can have fun in the outdoors and leave the worrying about bites behind.


Pin It For Later

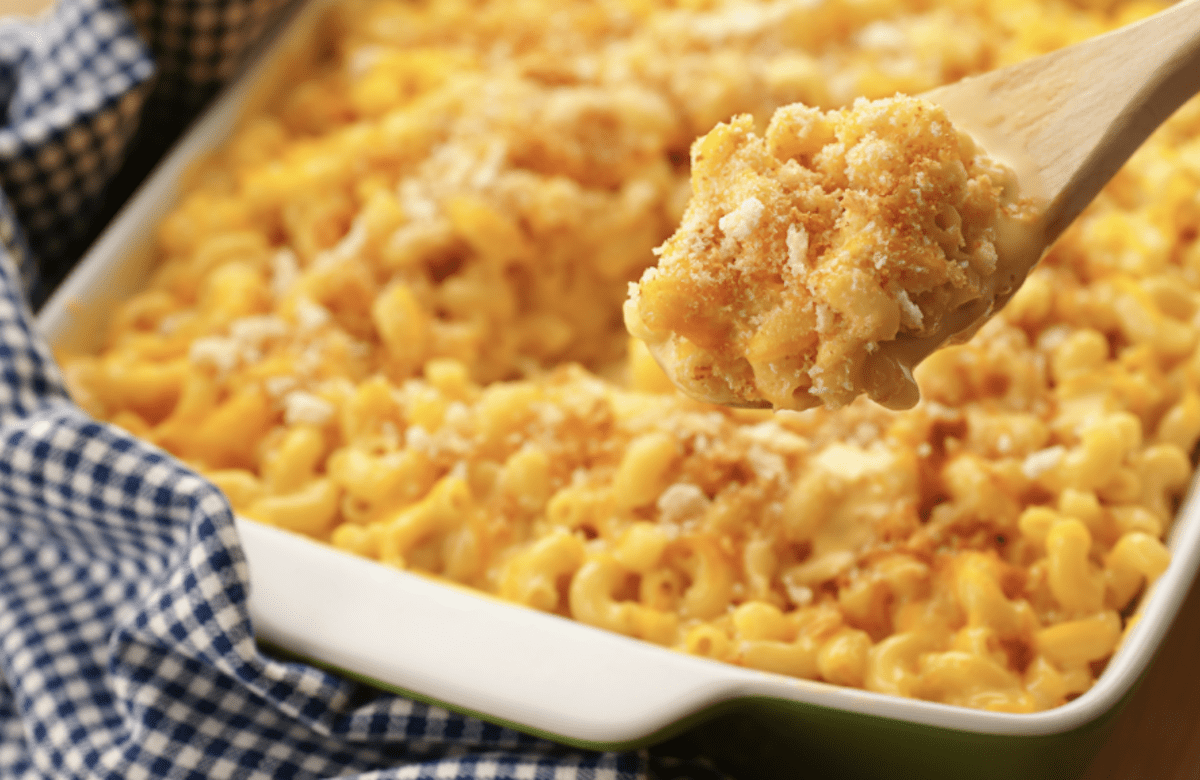
Mac N Cheese Three Different Ways


There’s comfort food and then there’s COMFORT FOOD. Mac N Cheese is definitely one of the big CFs. But, because we love to go beyond the average, here are three different recipes, from the ridiculous to the sublime. Seriously, lobster, bacon, and four cheese versions? Yes, your wish is our command.


Ultimate Mac And Cheese


Each one of these classic macaroni and cheese recipes has its own delicious twist. Easy mac and cheese make a great treat in general, but once you take it up a notch with extra special ingredients like lobster, crispy bacon, and complimentary cheeses, your taste buds will never be the same. We’ve chosen some of our favorite gooey, melty cheeses but feel free to add your own favorites.


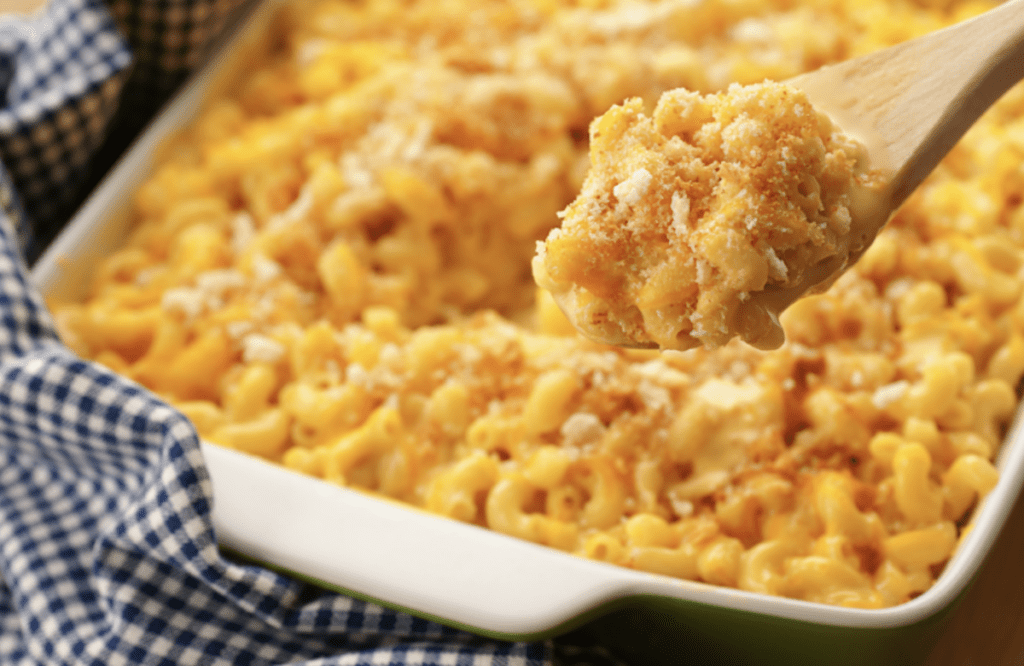
Perfectly Melted Macaroni And Cheese


Whenever we feel like we just want to put on our jammies and take it easy with an old movie and a bowl of comfort, any of these fabulous mac n cheese recipes will do. What makes them so great is that they’re also amazing if you want to dress up and drink champagne (or your beverage of choice). Either way, you’ll have a fantastic meal that will warm you to your soul. We’ve provided some suggested toppings and garnishes, but use your imagination and add whatever delights you.


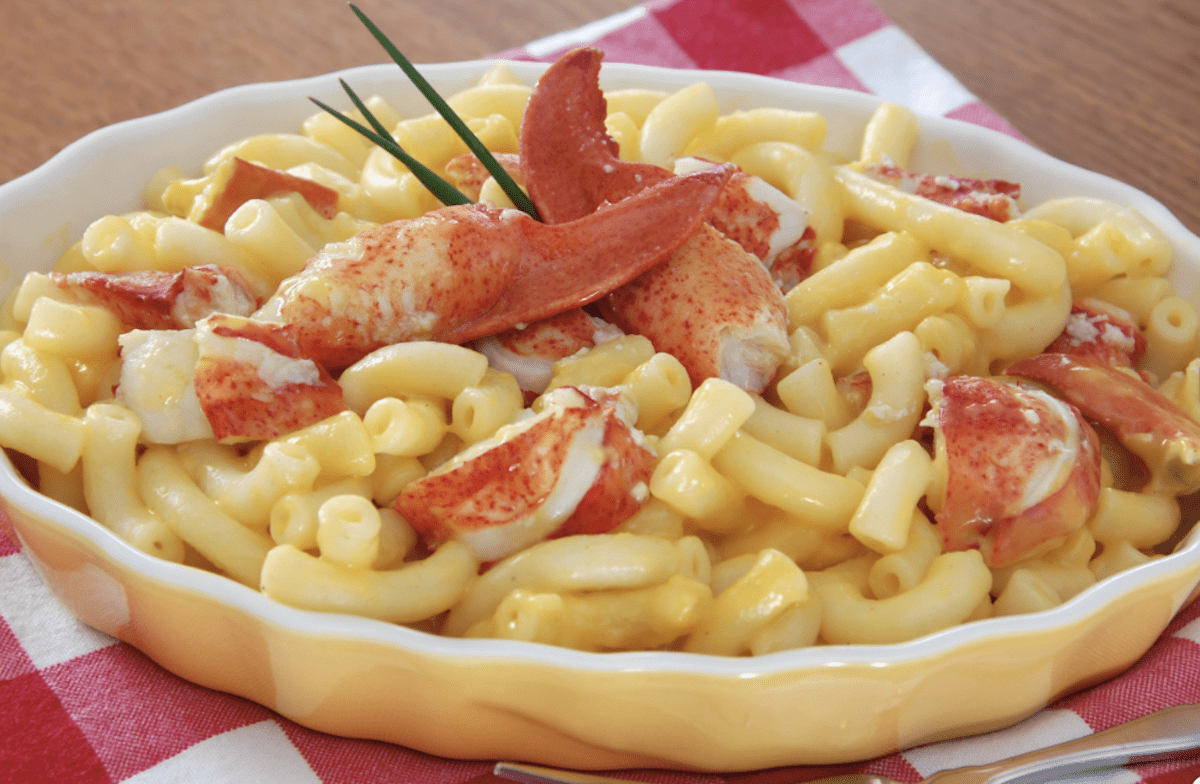
1. Luxe Lobster Mac and Cheese

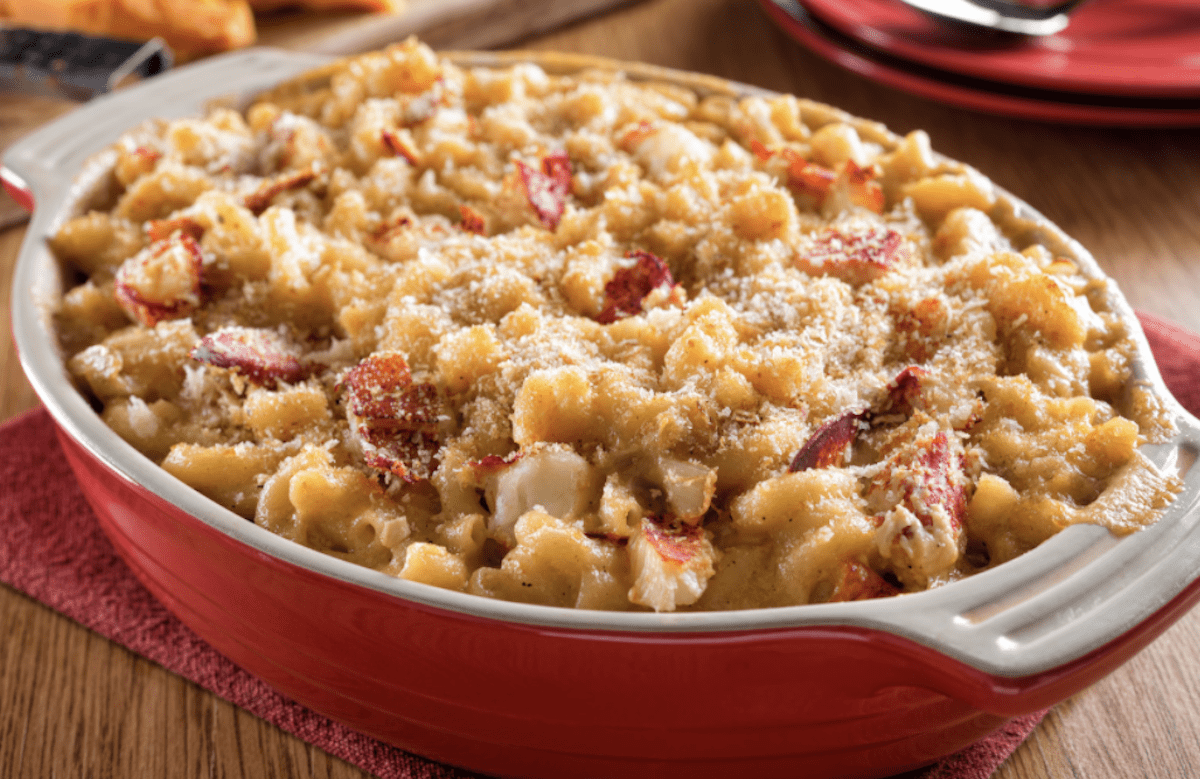
If you want to splurge and get the ultimate luxury out of mac n cheese, this creamy lobster mac and cheese is the way to go. The sweet buttery lobster adds a beautiful complement to the cheesy macaroni. You could also try using sweet crab meat like from giant king crab legs or stone crab claws. A crisp spicy Riesling, fruity Chardonnay, or hearty French white burgundy will go smashingly with this dish.


Lobster Mac N Cheese


Ingredients

1 pound macaroni
About 2 pounds of lobster tails
1 small onion, diced
2 tablespoons butter
2 cups milk
1 clove fresh garlic, minced
1 shallot, chopped
10 black peppercorns
Freshly ground black pepper and kosher salt to taste
5 Tablespoons flour, plus 5 tablespoons butter, or 2 tablespoons cornstarch mixed with water
2 pounds grated cheese, a mixture of Gruyere, extra sharp cheddar, and Parmigiano Reggiano
3 Tablespoons Panko bread crumbs (Japanese crispy crumbs)


Mac N Cheese With Lobster Claws On Top


Directions

Preheat oven to 350℉.

1. In a large pot, cook the macaroni according to the directions on the package for al dente.
2. Drain the macaroni and reserve, also reserve the water in a separate pot.
3. Steam the lobster tails over the reserved hot water for 3 minutes, then cool.
4. Remove the meat, and reserve both the meat and the shell. In a medium saucepot, cook the onions in 2 Tablespoons butter just until translucent, and remove.
5. In the same pot, scald the milk and add the garlic, shallots, and peppercorns.
6. Add the lobster tail shells to create a seafood stock.
7. Bring the “stock” to a boil, then reduce the heat to a simmer, season with pepper and, if desired, kosher salt to taste, and cook for 20 minutes.


Mac And Cheese With Lobster


8. Meanwhile, make a roux by combining 5 Tablespoons of flour with 5 Tablespoons of butter in a small saucepot over medium-high heat.
9. Cook until the mixture thickens and develops a golden yellow color.
10. Set aside roux.
11. Strain the stock and return it to the pan.
12. Once the stock begins to simmer again, slowly add in the cheeses and whisk until fully incorporated, making the sauce start to thicken.
13. Add the roux to thicken a little more.
14. Then add the reserved onions and lobster meat.
15. Toss the sauce with the macaroni, and transfer the mixture to a small baking dish.
16. Top with Panko bread crumbs, and bake for 8 to 12 minutes, or until bubbly and browned.


Dreamy Lobster Mac And Cheese


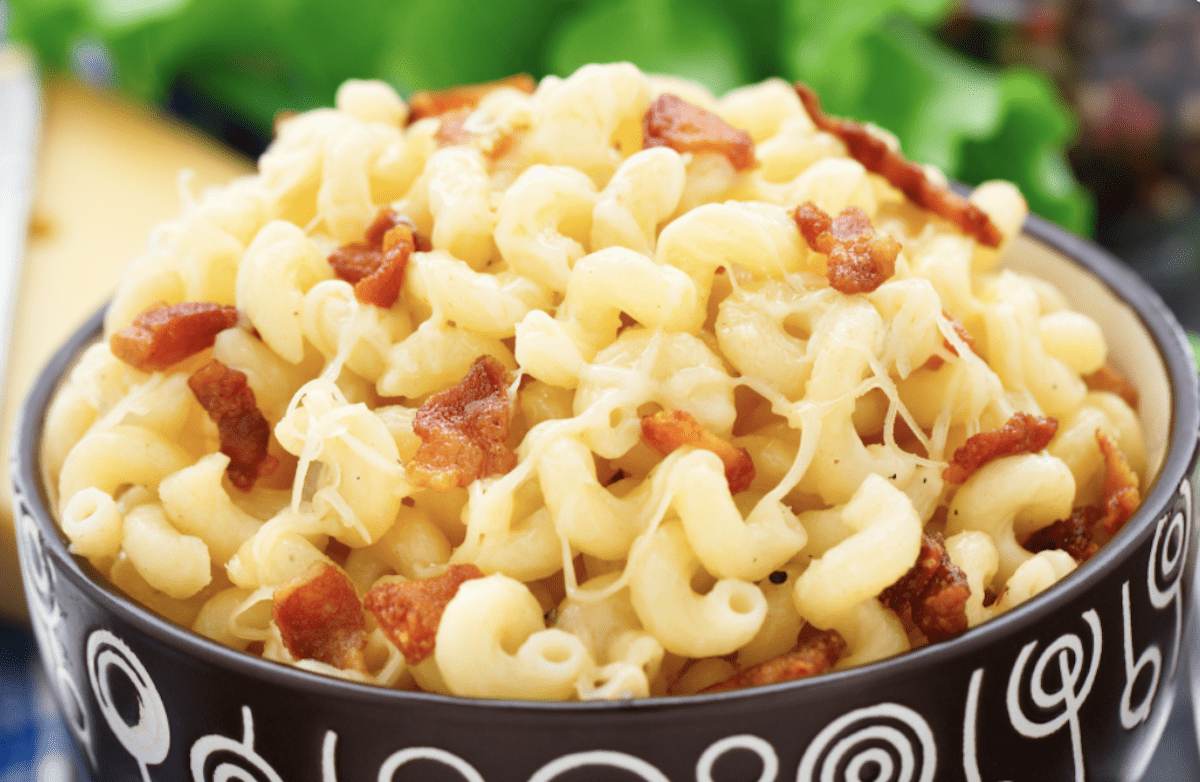
2. Crispy Bacon Mac And Cheese

Mac n cheese is classic comfort food so why not pair it with another comfort favorite – crispy bacon! The smoky-sweet crispiness of the bacon combines with the creamy mac n cheese to make a perfect combination. This is one for the ages that pairs well with an ice-cold beer or hard cider. But honestly, you can have anything you like with it because it’s hard to go wrong with this incredible dish.


Bacon With Mac And Cheese


Ingredients

16 ounces elbow macaroni
1 cup Panko bread crumbs (you could also use smashed butter-flavored crackers here)
8 slices bacon (thick cut is truly decadent)
1 teaspoon fresh ground pepper
4 Tablespoons unsalted butter
1 cup all-purpose flour
4 cups milk
16 ounces shredded cheese – sharp cheddar and white cheddar work well together


Cheesy Bacon Mac


Directions

1. Preheat oven to 375℉.
2. Cook macaroni according to package directions for al dente.
3. Meanwhile, chop raw bacon into small pieces.
4. Drain macaroni and set aside.
5. Return pot to medium heat and cook bacon until crisp, about 5 minutes.
6. Pour crispy bacon pieces and grease into a medium bowl; stir in bread crumbs and pepper.


You Could Just Drop The Bacon On Top


7. Melt butter in a pot, still over medium heat.
8. Take 1 teaspoon melted butter and grease an 8 x 8-inch square baking dish.
9. Add flour slowly to butter in a pot; cook 1 to 2 minutes, stirring continuously.
10. Slowly whisk in milk, stirring to prevent scalding, and cook until sauce is thick and smooth, about 3 minutes.
11. Turn off heat and add cheese and stir until smooth.
12. Stir in macaroni and coat with sauce.
13. Spread mixture into greased pan.
14. Sprinkle top with bacon and Panko bread crumb mixture.
15. Bake 30 minutes and serve warm.


Crunchy Bacon On Top Of Mac N Cheese


This version is so versatile! You could skip the topping altogether and add some shredded cheese and green onions on top for a colorful “loaded” version. Or, for a super easy approach, just make your favorite mac and cheese and top it with whole slices of crispy bacon and bite the bacon as you go!


3. Creamy  4 Cheese Mac And Cheese

If you think one cheese mac n cheese is good, then you’re going to go crazy for this four-cheese mac and cheese, which we think is insanely good. To pair this one you can choose as you like because this mac n cheese dish goes well with just about any beverage. For red wine, you might choose a pinot noir, chianti classico, or gentle Zinfandel. Or opt for a hearty IPA or your favorite craft beer. We also love cider and hard root beer with this one. If you’re feeling crazy indulgent, add a piece of fried chicken and top it all off with a glass of champagne!


Perfect Four Cheese Mac N Cheese


Ingredients

1 package (16 ounces) macaroni pasta
3 Tablespoons plus 1 teaspoon butter
3 Tablespoons all-purpose flour
2 1/2 cups milk
1 teaspoon onion powder
Kosher salt (if desired) and fresh ground pepper to taste
8 ounces Gouda cheese, grated
4 ounces sharp Cheddar cheese, grated
4 ounces Swiss cheese, grated
1/2 cup fresh grated Parmigiano Reggiano cheese
2/3 cup Panko (Japanese) bread crumbs
Chopped fresh Italian flat-leaf parsley (optional garnish)


Four Cheese Mac N Cheese


Directions

1. Heat broiler.
2. Coat a 9 x 9-inch broiler-safe baking dish or six 8-ounce ramekins with nonstick cooking
spray.
3. Bring a large pot of water to a boil.
4. Add macaroni and cook to al dente, following package directions.
5. Drain macaroni and transfer to a bowl.
6. Heat 3 Tablespoons of butter in a medium-size saucepan over medium heat until melted.
7. Add flour, whisking to blend.
8. Gradually add milk; whisk until smooth.
9. Bring to a simmer over medium to medium-high heat, stirring continuously, to prevent
scalding.
10. Add onion powder. Add salt, if desired, and pepper to taste.
11. Simmer 3 minutes, then remove from heat.


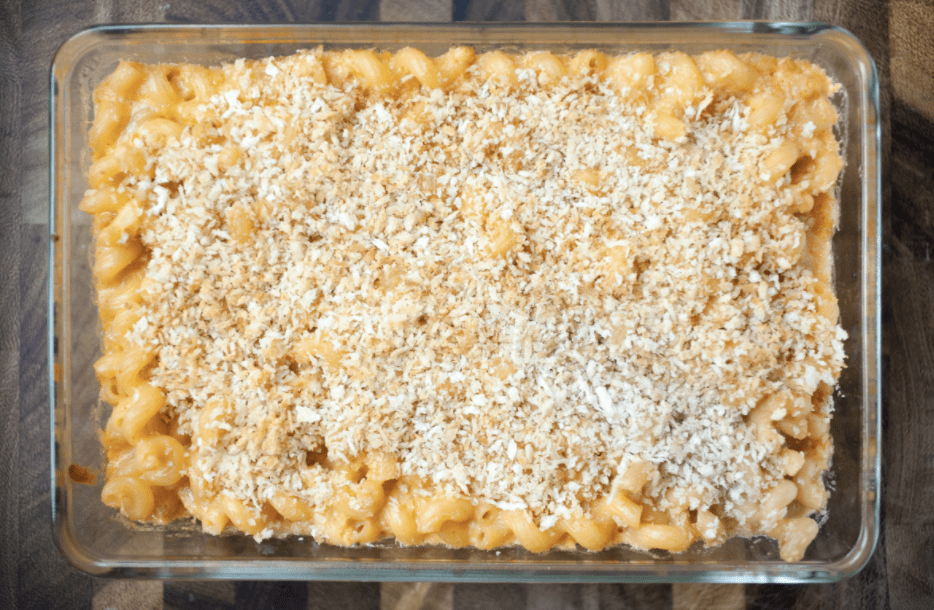
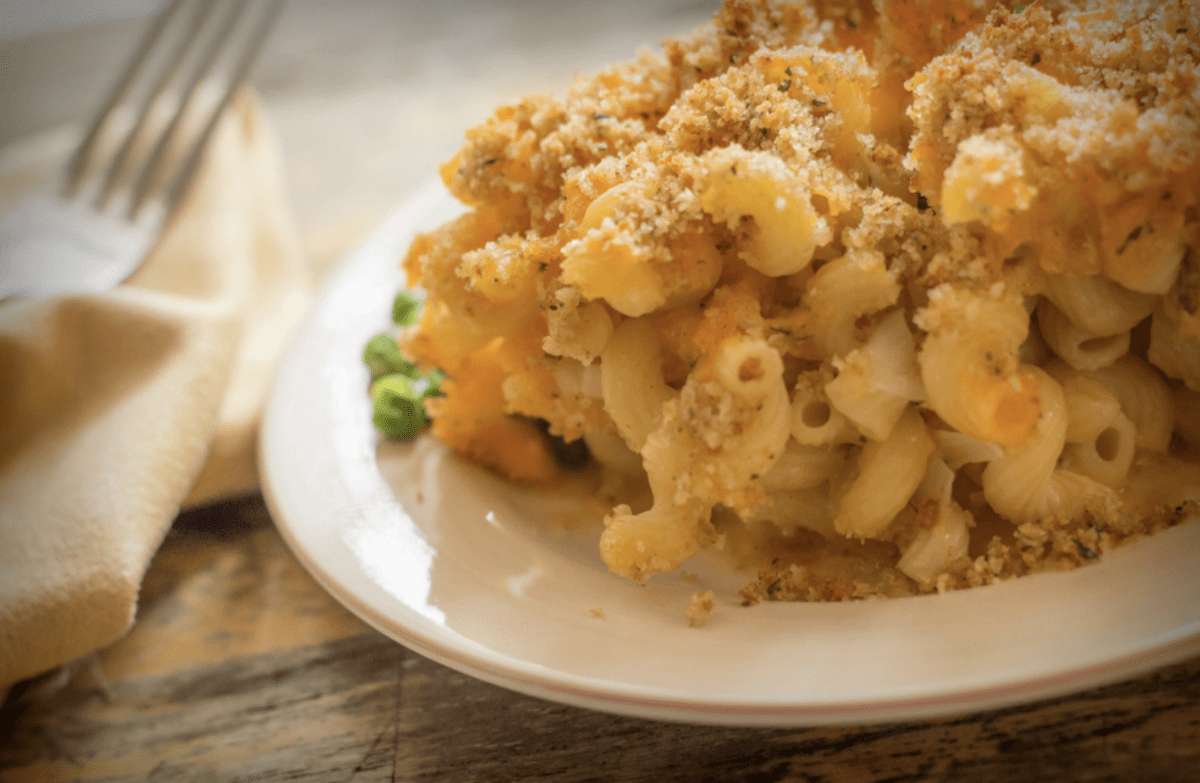
4 Cheese And Mac With Crunchy Topping


12. Stir in Gouda, Cheddar, Swiss, and 1/4 cup of the Parmigiano Reggiano until the cheeses
are melted together and the sauce is smooth.
13. Mix cheese sauce into cooked macaroni and pour the mixture into a prepared baking dish or ramekins.
14. In a medium-size microwave-safe bowl, melt the remaining 1 teaspoon butter. Stir in Panko bread crumbs and remaining 1/4 cup Parmigiano Reggiano.
15. Spread Panko/Parmigiano mixture evenly over the macaroni.
16. Broil 3 minutes or until bubbly and golden brown.
17. Garnish with Italian flat-leaf parsley, if desired.


Creamy Four Cheese Mac N Cheese


You can also skip the crispy topping and just add freshly grated cheese when serving. We also love to mix in veggies with this version like cauliflower and broccoli florets. It makes for healthy and hearty comfort food.


If you want to try some different cheeses, read more about some of our favorites like Parmigiano Reggiano and Asiago. And check out our take on Comfort Food Around The World for some other yummy ideas. Happy eating!


Pin It For Later!

Mac and Cheese


Cheese. It’s one of our favorite foods. And it’s one of the easiest ways to bring the taste of travel home. It’s in so many of our recipes and dishes and it’s perfect all on its own. Parmigiano Reggiano, known as the “King of Cheese,” is one of our absolute favorites.


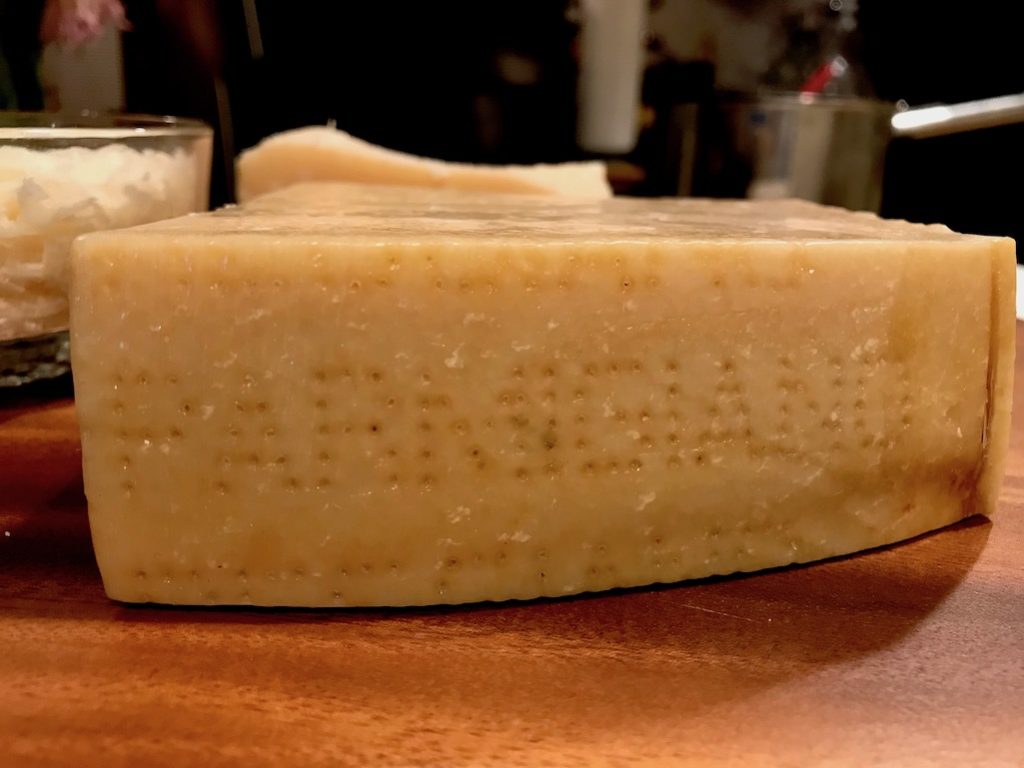
Parmigiano Reggiano cheese
Parmigiano Reggiano cheese.


When you see the pinholes on the rind you know that you have the authentic Parmigiano Reggiano. Three simple ingredients – milk, salt, and rennet are in every single wheel of this nutty, buttery, delicious cheese. It’s produced only in the Italian provinces of Parma, Reggio, Emilia, Modena, and parts of the provinces of Mantua and Bologna. For over eight centuries this cheese has been a way of life for generations of artisans cheesemakers.

It’s also fun to note that Thomas Jefferson, not only a founding father but America’s original “foodie,” discovered Parmigiano Reggiano cheese even before he became the U.S. Ambassador to France. He was fascinated by a “steam-powered grater” that was used to turn parmesan cheese into a pile of grated cheese in no time.

Little did he know that years later as convenience foods made housewives’ lives easier, a powdered cheese bearing no resemblance to the cheese he loved found its way into a shaker can. While this cheese was shelf-stable it was not the Parmigiano Reggiano he knew. It is loaded with sodium and preservatives. Bleh!

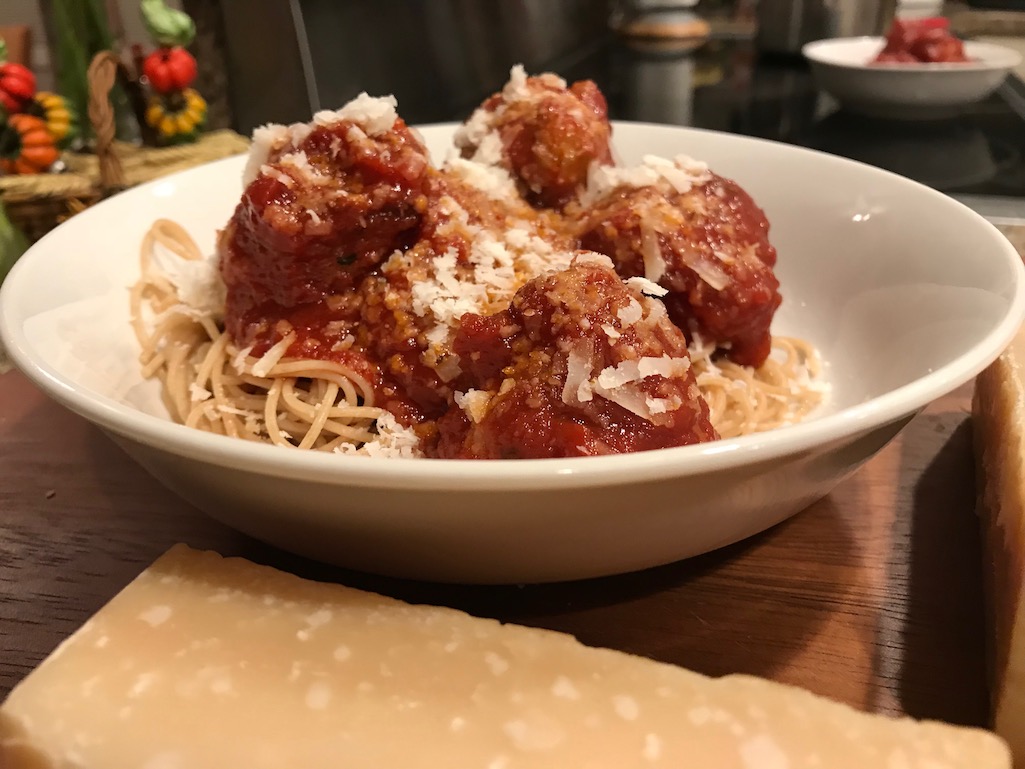
Spaghetti and Meatballs with Parmigiano Reggiano


High Protein Food

What you might not know about Parmigiano Reggiano is that it has many healthy values. It’s naturally lactose-free making it great even for those who are lactose intolerant. It has a long aging process that makes it easy to digest. Providing a great source of protein, calcium, and vitamins, and minerals it’s also relatively low in sodium compared to most cheeses. That’s great news for those looking to keep to a lower sodium diet. It’s a perfect cheese for babies (8 to 10 months), children, seniors, athletes, and anyone looking for a great source of protein. Sounds like cheese heaven to us!

Here are just some of the many ways we serve Parmigiano Reggiano:

  • On our charcuterie boards
  • Sprinkled over pasta
  • Caesar salads
  • Tasty crisps for soups and salads
  • Pizza topping
  • Chicken Parmesan
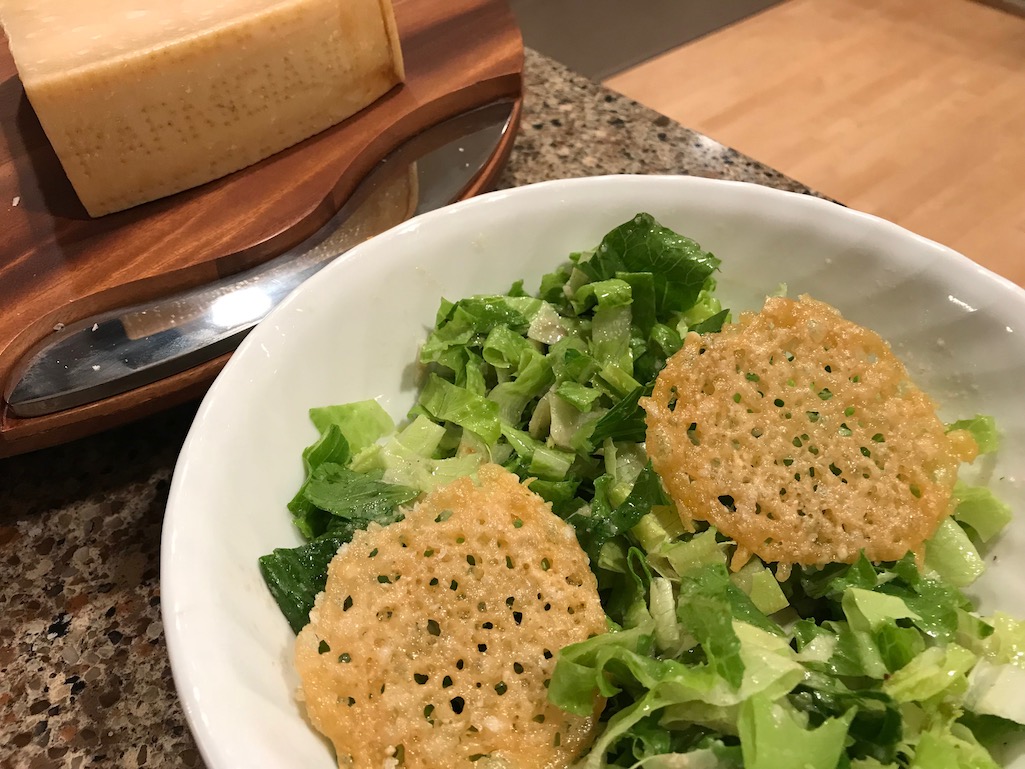
Parmigiano Reggiana Crisps on salad
Parmigiano Reggiano Crisps on salad


Parmigiano Reggiano Crisps are one of my favorite treats. They are so easy to make that even I can do it. Everyone knows that I’m an eater, not a cook. But you just need to know how to turn the oven on and shred some cheese for this simple recipe. I guarantee that you’ll be everyone’s new best friend when you bring these out at a dinner party.

Parmigiano Reggiano Crisp

Preheat your oven to 350°.

Shred 1 cup of Parmigiano Reggiano cheese in a bowl.

Line a baking sheet with parchment paper.

Create small piles of cheese on the baking sheet using about 2 tablespoons of cheese for each pile. These will make approximately 4-5 inch round crisps. You can reduce the amount of cheese in each pile if you’d like smaller crisps.

Bake in oven 10-15 minutes or until golden brown.

Let them cool off and place on salads or soups. If you have leftovers (you probably won’t) store them in a plastic bag with parchment between each crisp so they won’t stick together. They will stay fresh and crispy for 2-3 days.

Whether you’ll be trying one of our suggestions or including Parmigiano Reggiano cheese in your favorite recipe be sure to treat your guests to the best. To learn more about Parmigiano Reggiano visit their website parmesan.com.

Pin It To Your Food Travel Favorites

Cheese pin


Thank you Parmesan.com for providing us the samples of Parmigiano Reggiano cheese to test for this sponsored post.  All opinions we provide are our unique views and reflect our experiences. We pledge to provide our audience with truthful and honest reviews.


We have discovered a lot of fun activities to enjoy over the years. But as with many things in life, the longer we’re around the more we realize we don’t know. Luckily, our sense of adventure keeps us searching for new fun things to do. And one of the most fun things we’ve discovered is snowshoeing. Yes, that’s right. That activity where you strap things to the bottom of your boots and walk around like you’re not on snow. Well, kinda. It’s actually great exercise, easy to do (if you work it out that way), and gets you into the great outdoors when most of the time you’re stuck inside. We’ve been doing it for a few years now and have loved it every time. Here are our best tips to learn how to snowshoe like a Food Travelist!

via GIPHY

1. Discover What Is Snowshoeing

The first thing to do is to understand what snowshoeing is all about. There are different types of snowshoeing, just like there are different types of snow skiing, While some may enjoy tackling steep and rugged terrain in mountaineering snowshoes, that’s not for us. We like the joy of wearing regular snowshoes (also known as snow shoes), finding a clean path that may have a little up and down for exercise, and open areas all around us where we can take in some lovely views.

snow shoe

Snowshoeing (or snow shoeing) is good for people of any age if you are healthy enough for a vigorous walk. Because, in its purest form, that’s what snow shoeing is to us. It’s taking a walk, in the snow. That’s it. The rest is just details. So, if you’re looking for the shortest answer, snow shoeing is walking on snow with the aid of snow shoes. Pretty simple, right?

2. What To Wear

Just like any other outdoor activity, you’ll want to know what to wear snowshoeing. A few items we’ve discovered are extremely helpful to add to your list. Sunglasses with reflective lenses are fantastic not just for blocking out the sun, but for keeping the glare of the white snow all around you at bay. For the ultimate in ease, find some that also have an adjustable strap on the back so you don’t have to worry about losing them along the way.

Diana Snow shoeing
Diana snowshoeing

Another great item to have is a gaiter or balaclava. A gaiter is like a turtleneck without the shirt. It’s kind of a fabric tube you pull on that keeps your neck warm. You can also pull it up a bit to provide some protection for your face. It’s often made of fleece or another soft fabric. A slightly different version of the gaiter is the balaclava. This handy item is great for when its cold or if you find yourself getting chilled from the neck up. Like the gaiter it’s a tube of fabric but is generally a thin, stretchy one. You can pull it up to the top of your head to cover your ears. You can also pull it up over your nose or mouth to keep the chill off your face.

Gloves, hats, and layers of clothing work great. If you get warmer as you’re snowshoeing, you can peel off the excess. Once you know how to snowshoe in general, you can choose different items to fit the weather. When there’s a lot of fresh snow or if it’s gotten a bit icy, we like wearing a thin pair of snow pants over our jeans. If it’s super cold, don’t forget to wear long underwear.

3. Snowshoe Equipment

Snowshoeing equipment is pretty simple. If you’re looking for more adventurous snowshoeing options, you can look into mountaineering snowshoes and other related equipment. But for us and those just looking for a great way to get a little fresh air and exercise, a simple set of snowshoes and poles is pretty much all you need. Snowshoes for women don’t need to be any different from snowshoes for men, though some companies offer more sophisticated options based on height, weight, and experience, very similar to ski criteria. When people ask us what the best snowshoes are, our answer is whatever you want within your price range and ambitions.

snow shoes

We got our snowshoes at Costco. They were under $70 and came in a nice kit that included poles and snowshoes with a carrying bag. But you don’t necessarily have to purchase your equipment. There are parks, trails, and other outdoor areas that have places where you can rent snowshoes, just like you would rent skis. A snowshoe rental may last for a few hours to a few days, depending upon what you plan to do. One time, we just planned to go for an hour or two walk in the gorgeous Yellowstone area, so just rented snowshoes and poles for a few hours.

4. Where To Go Snowshoeing

Depending upon where you live you may have a great many or a few snowshoeing options nearby. One quick way to find out where to go is to head to Google and search “snowshoeing near me” for results. Chances are you’ll find some spots worth exploring. Unless, of course, you live somewhere that doesn’t get much or any snow. Then you’ll want to think about where you might like to spend some time traveling to for the white stuff.

Snowshoeing in Yellowstone

Wherever you seek out places that are good for snowshoeing, you’ll want to have things to look at while you snow shoe. The reality is that many local, state, and national parks have trails that allow for snowshoeing. In Wisconsin where we are, there are several parks that have trails groomed especially for people who have learned how to snowshoe and want to do some exploring on well-groomed paths. This is not to say that all parks will have snowshoe paths. Some groom their trails for skiing, and those will usually not allow snowshoeing because they want to keep the trails smooth for thin cross-country skis.

snow shoeing

Just about anywhere in the world will have some places to snowshoe. Some of the best-known spots include winter sports of all kinds, including snowshoeing. New Zealand, California, Wisconsin, Canada, Spain, Finland, Italy, and Japan all have wonderful places for snowshoeing. So whether you want to stay close to home or go for an adventurous winter vacation, there are lots of places where you can easily pursue snowshoeing.

snow shoe

5. Don’t Forget The Fluids

Because you’re having so much fun walking on top of the snow, don’t forget to bring and drink plenty of water and other fluids. You’re getting more of a workout than you realize. You’re also out in the elements, which we tend to forget once we get warmed up and start peeling off the layers. If you carry a backpack with you, include plenty of fluids and some snacks. If you’re just going for a short snow shoe, still be sure to take a bottle of water with you. For those who enjoy warming up with some hot liquid, fill an insulated bottle or thermos with something warm and tasty like hot tea, cocoa, or soup. It’s fun to take a break and look back at where you’ve been with a few sips from something warm and yummy.

6. Take A Friend Snowshoeing

While snowshoeing is a wonderful activity that you can enjoy by yourself, it’s even more fun when you have someone else to share it with. It’s great to stop and take in a wonderful vista or great scenery with someone that can share the view. It’s also a great way to be “alone together,” one of our favorite ways to beat boredom, engage in some social activity while also being able to have time alone to mentally focus on yourself.

snow shoeing

Snowshoeing is just enough exertion to help keep your body flexible. It’s better than getting stiff sitting in front of a computer all day! Of course, the safety factor is also there. Especially if you plan to go snowshoeing right after a big snowfall or take a long or multi-day journey. Having a friend accompany you is a great way to minimize risk. And, instead of having to keep taking selfie after selfie, you’ll have someone to take your photo and share the stage with too.

7. Try Something Different

Snowshoeing offers a variety of ways to experience the beautiful outdoors in winter. We have snowshoed in National Parks as well as in local areas. Some of the most memorable of our snowshoeing experiences have come in the form of special events. Clubs, parks, and snowshoe enthusiasts often organize snowshoeing events. For our part, some of our best snowshoeing has been during these events.

winter festival

For us, snowshoeing at night has been a real treat. We’ve snowshoed at marshes, parks, and well-known and hidden trails. Moonlight or starlight snowshoeing gives us a real treat because there are usually small candles along the trails and tasty delights like hot cocoa and s’mores to be had at the end of the trail. One event we attended at our own nearby park had other activities like hockey, cross-country skiing as well as ice carving, and other creative activities. It made for a great evening outside and some wonderful memories to revisit as well.

For more on snowshoeing check out our article on Travel Awaits for our 9 Reasons To Try Snowshoeing This Winter.

Save it for later, Pin it

snow shoe pin.    snow shoe

Welcome to our new series on creating global tastes from home. For us Food Travelists, tastes of food from around the world are one of the reasons we love to travel. But when we’re not traveling, we still want great flavors from around the world. In this “Tastes Of…” series of articles, we’ll be posting ideas,  recipes, and suggestions for different cuisines around the world. We’ll share some of our favorite ways to bring the tastes of travel to your table. If there’s a cuisine you’d like to learn more about, send us a note.

Tastes Of China

We have had the great pleasure of traveling to China more than once. We’ve scaled the Great Wall, seen Tiananmen Square, walked through the Forbidden City, and visited tea shops galore. One of the best things about spending time in China is eating the fresh and delicious local cuisine.


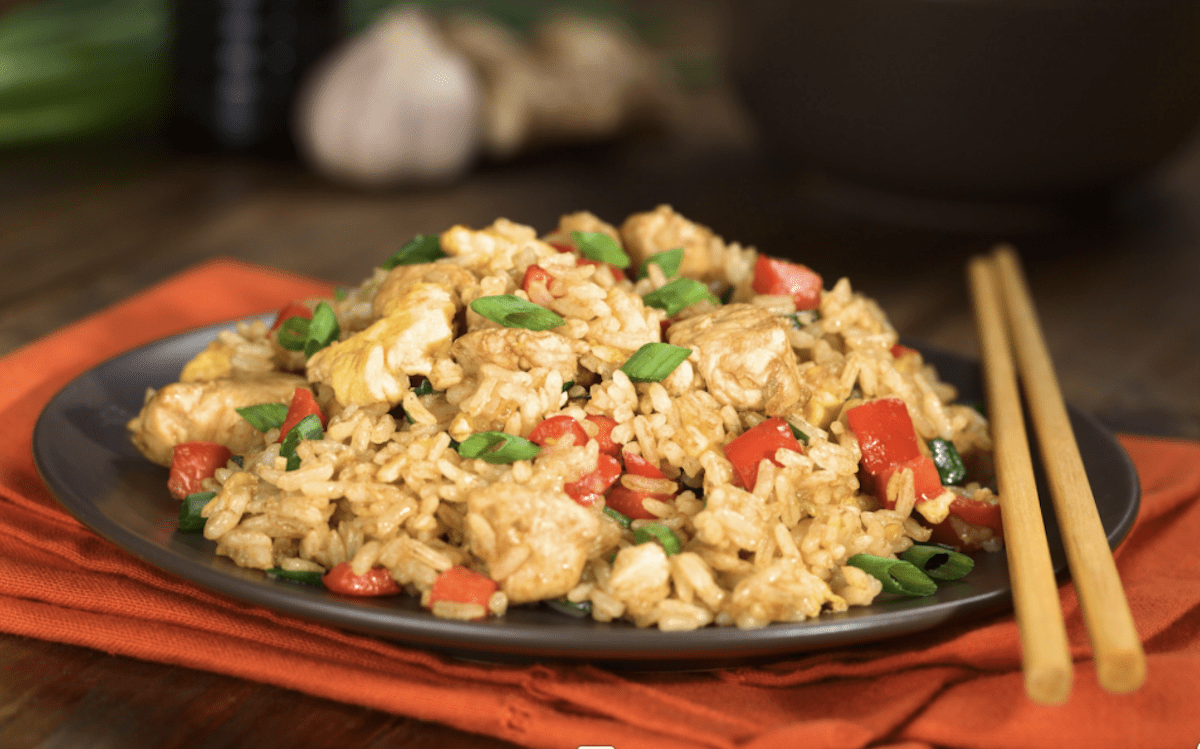
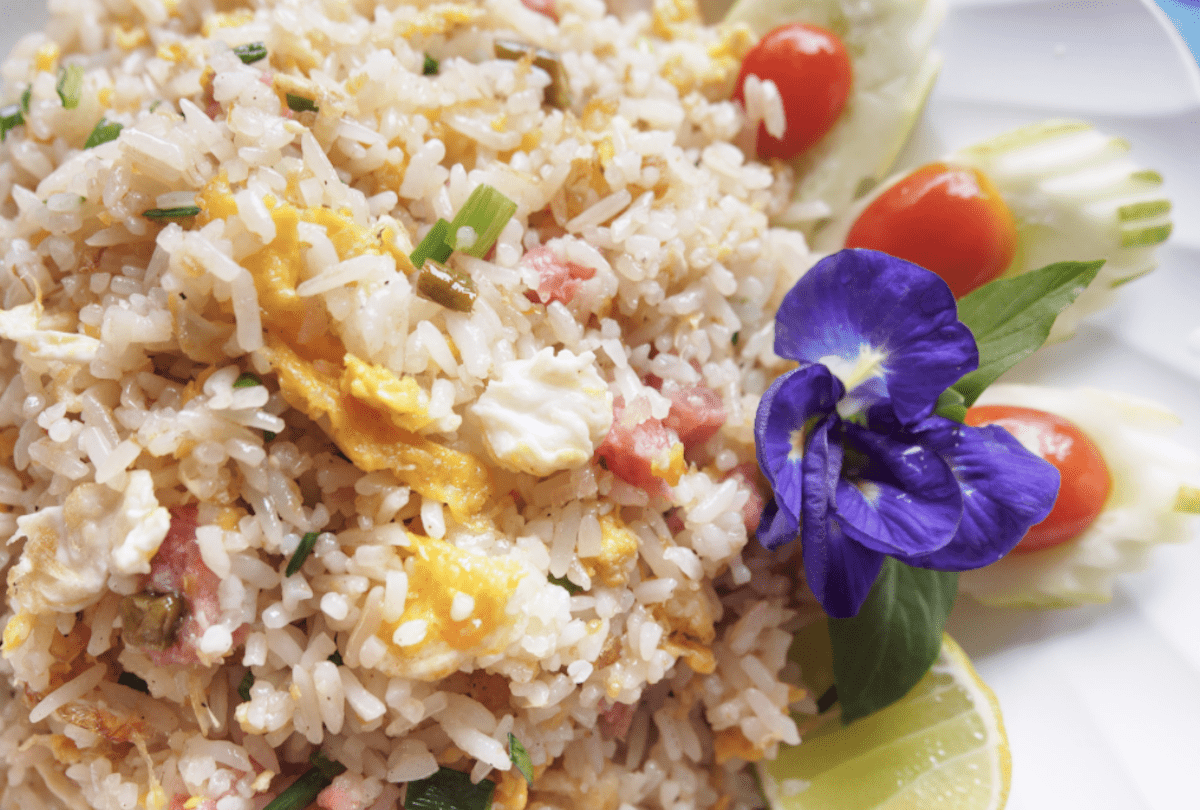
Chicken Fried Rice


For the best tastes of food from around the world, sometimes you’ll discover them in your own back yard. You may enjoy the way they are prepared with a local twist better than their original form. And sometimes, best loved dishes didn’t originate in their homeland at all. That’s quite common for us when it comes to Chinese flavors. As Americans, we lay claim to some delicious unique creations and adaptations of authentic Chinese cuisine. So we’ll give you a few different approaches to enjoy the tastes of China. Whether you order in, cook at home, or travel to China, we’ll share some ideas for making your meals delicious and fun.

The Importance Of Rice

As in many countries around the world, rice is an important part of Chinese cuisine. China, consumes more rice than any other country in the world, over 140 metric tons annually. Fortunately, China is also the world’s largest producer of rice. About two-thirds of the Chinese population consume rice as a staple in their diet. So, it’s no wonder that China has created many different ways of serving rice. Of course, plenty of people love the traditional plain steamed version.

Chinese Fried Rice

One of the most traditional and flexible ways of serving rice in China is Chinese fried rice. This is one of the oldest methods of preparation, dating back to the Sui dynasty around 589 CE. But it was later in the Ming dynasty from 1368 CE that the concept really took off. The dish originally began as a way to use up leftovers from the day before. The food is still good to eat but could use a little refreshing.


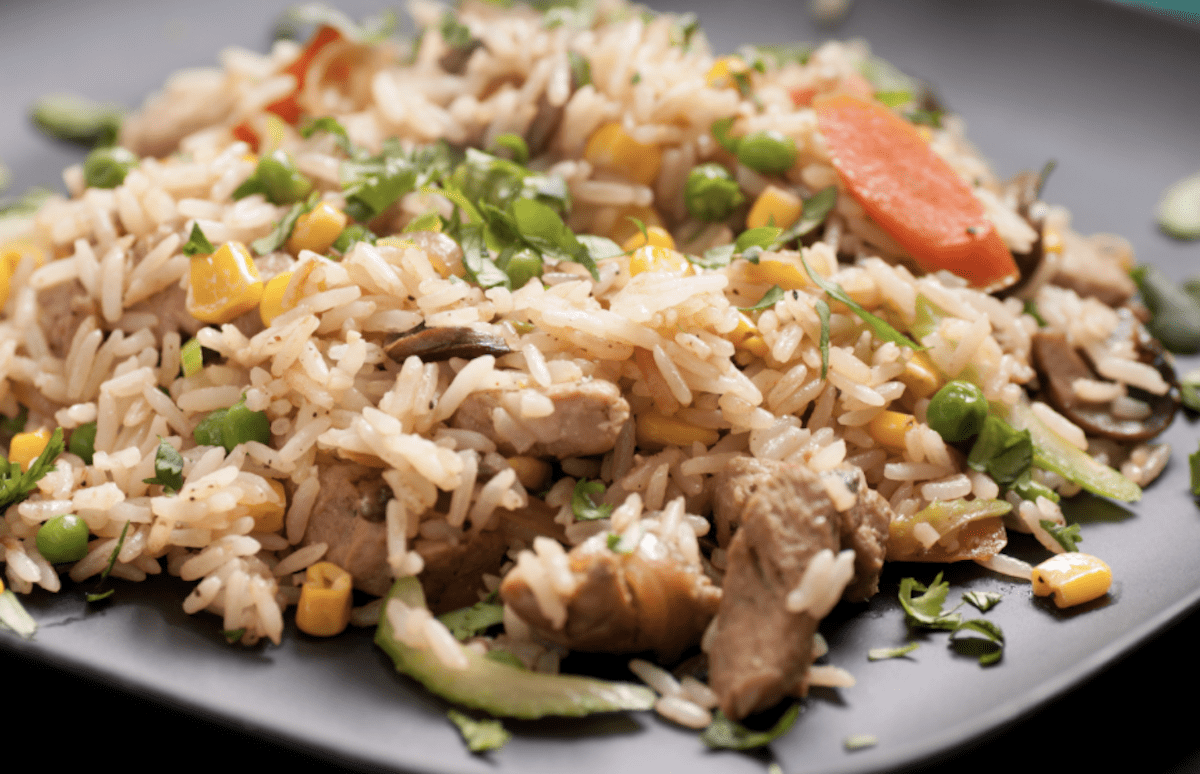
Loaded Fried Rice


Different parts of China have different versions of fried rice. Yangzhou fried rice typically contains meat and vegetables. Chopped left over char siu barbecue pork, cooked shrimp, peas, and carrots are common. Scrambled egg yolks join as well. Then the whole dish is infused with a light sauce of soy and garlic to add seasoning. Hokkaido or Fujian fried rice often includes seafood such as scallops and prawns, chicken, and mushrooms. The ingredients gain punctuation with a thick soy and oyster sauce. Sichuan fried rice, like much Sichuan cuisine, adds a spicy doubanjiang chili based sauce.

To make your own Chinese fried rice at home, try our Easy Fried Rice Recipe.

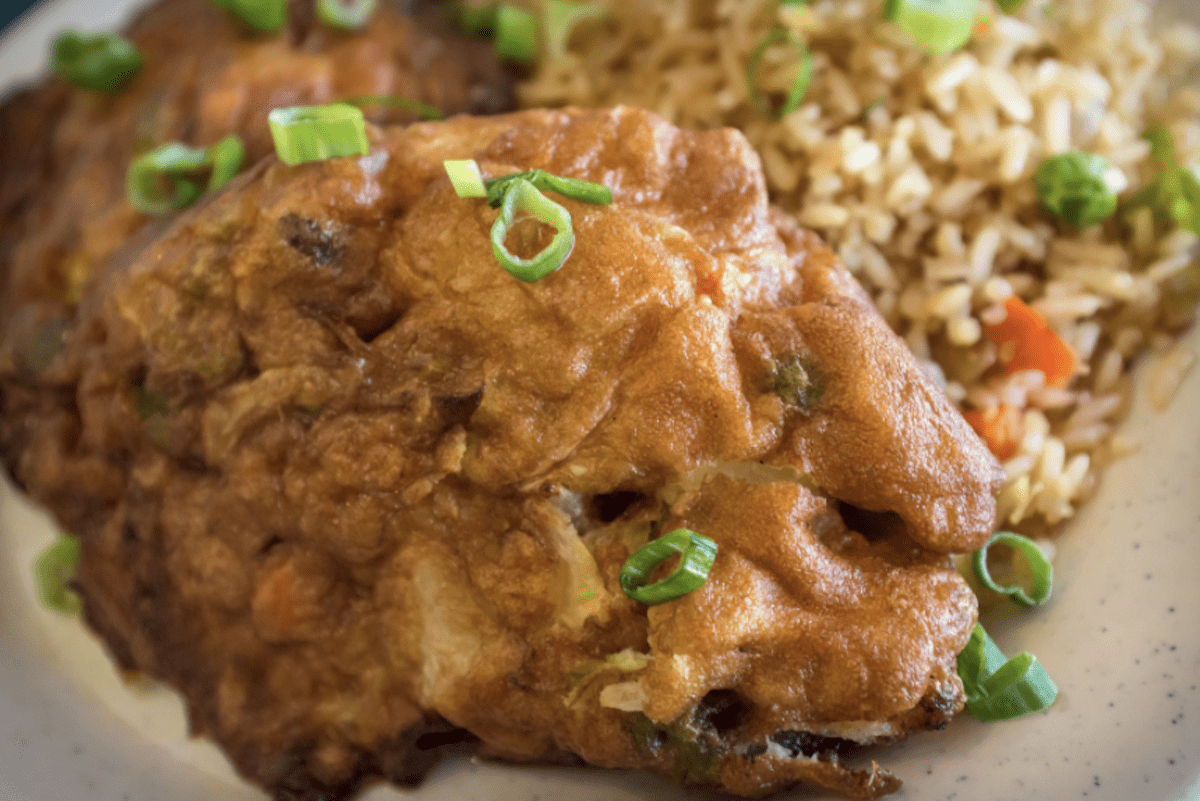
Egg Foo Young

You will find this traditional Cantonese dish spelled in various ways, including Egg Fu Yung. Not surprisingly, you will also find it prepared in various ways as well. The original creator is debated, from a scholar in the Ching dynasty of the 18th century to ancient recipes of egg “pancakes” filled with meat or vegetables dating back to ancient times. A likely place of origin is the southern provincial Chinese province of Canton, now known as Guangdong. And while Chinese-American adaptations often include a thick sauce, many of those created in China offer a thinner, light mushroom sauce or simple soy sauce instead.

Egg Foo Young And Fried Rice


We find this one of our favorite meals when we want some protein without a lot of fuss. The eggs provide plenty and we add whatever veggies we have, definitely mushrooms, and leftover bits of chicken, pork, or beef if we have that as well. It’s a simple dish to make, and you can decide whether or not you want the sauce. Here’s our simple Egg Foo Young recipe that you can easily make at home.

Egg Foo Young Recipe

Here’s our approach to one our favorite tastes of China. We put examples of ingredients for reference. You can exchange, add, or subtract any from the list as you choose. The only thing you really need is eggs! Egg Foo Young is a great way to use up leftovers you have around as well.

Ingredients

For Eggs

8 large eggs, beaten together
1 large stalk celery, sliced thin
1/2 cup onion, small diced
1/2 cup mushrooms, small diced or thinly sliced
3 whole green onions, chopped
1/2 cup fresh or canned bean sprouts
1/2 red bell pepper, small diced
1 cup rotisserie or cooked chicken, leftover pork, beef, or shrimp, diced


Egg Foo Young


For Sauce (optional)

1 1/2 cups chicken or vegetable broth
3 Tbsp light or low sodium soy sauce or tamari
1 Tbsp brown sugar
2 teaspoons Worcestershire sauce
1 Tbsp seasoned rice vinegar
2 Tbsp cornstarch
3 Tbsp cold water

Use oil of your choice for cooking, preferably one with a high smoke point and that doesn’t have much flavor such as safflower, sunflower, grapeseed, canola, or peanut. Start with 1 Tbsp in the pan, and add more add more as you cook if you need it to keep the eggs from sticking to the pan. To add an extra bit of tastes from China, sprinkle a tiny amount of sesame seed oil into the sauce.

Directions

  1. Lightly beat the eggs together in a large bowl. Add the vegetables, meat, and 1/2 the green onions and blend together gently.
  2. Combine broth, soy sauce or tamari, brown sugar, Worchestershire, and rice vinegar in a small saucepan over low heat.
  3. In  small mixing bowl combine cornstarch and water to create a slurry. When the broth mixture is warm, drizzle the cornstarch blend into the sauce and continue stirring until it thickens slightly and bubbles. If you want a thinner sauce, cut the amount of cornstarch in half. You can also delete the sauce and top your Egg Foo Young patties with tamari, soy, or nothing at all!
  4. Heat a nonstick skillet with 1 Tbsp of oil over medium heat. Depending upon the size of patties you want, add half a ladle or more of the egg mixture to the pan. You can make them as small or large as you prefer. We generally use 1/2 to 3/4 cup per patty.
  5. Cook the egg mixture like you would a pancake, until lightly brown on the bottom.
  6. Flip the pancake and brown on the other side, making sure the middle is cooked through.
  7. Remove each egg patty from the pan and put on a plate in a low warmed oven to keep warm while finishing the others.
  8. Serve the patties warm with (or without) the gravy, and sprinkle the tops with the rest of the sliced green onions.

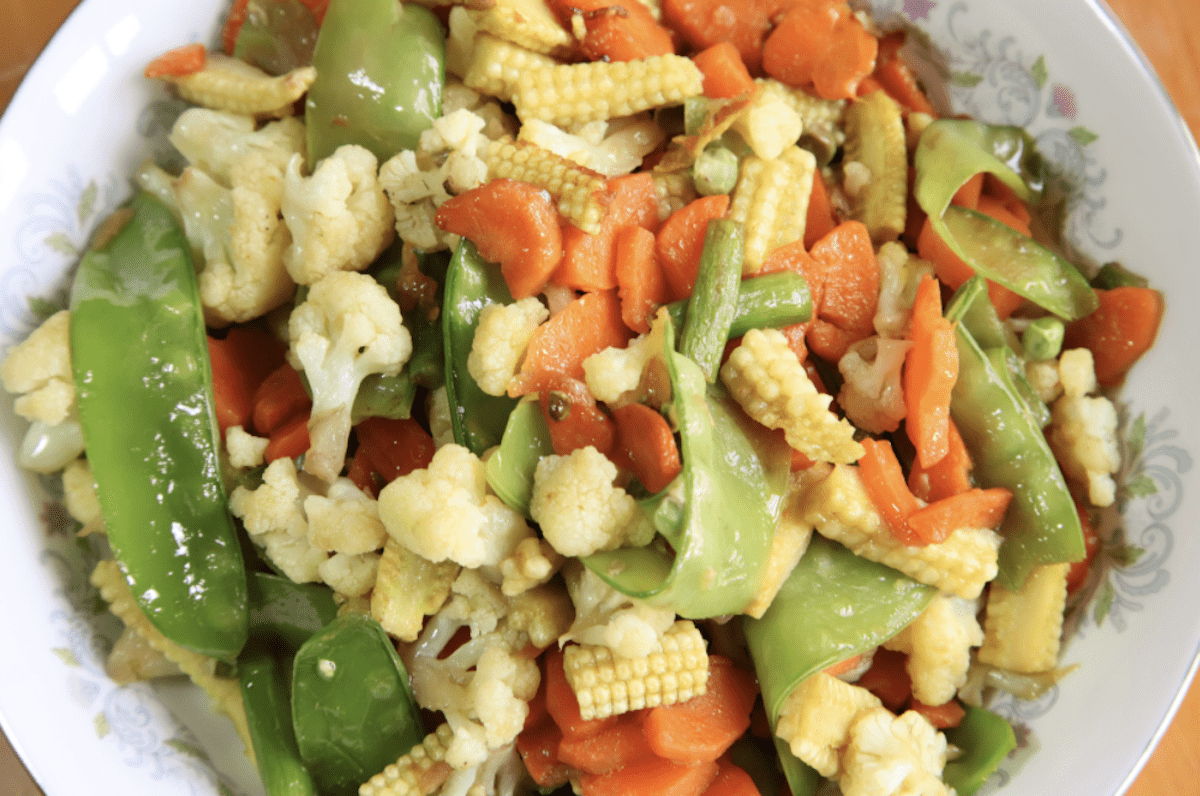
Chinese Veggie Stir Fry

Chinese Vegetable Stir Fry

Whenever we’re hungry for something we want quickly, we look in the fridge to see what we have on hand. If we’re in luck, there are plenty of fresh vegetables there and we’re in business for making an easy and tasty stir fry. We love to make a Chinese vegetable stir fry because it’s a great way to get plenty of veggies as well as make very little mess in the kitchen. Depending upon our mood, we may make a stir fry sauce to go with it. A simple teriyaki involves soy sauce and sugar. Something more complex can add ginger, garlic, and a little oyster sauce, if that’s around. But we also skip the stir fry sauce entirely, or sprinkle a little low sodium soy sauce or seasoned rice vinegar. Served with rice, a Chinese vegetable stir fry makes a quick and tasty meal. Here’s how we do it.

Chinese Vegetable Stir Fry Recipe

This is more like a guideline than a recipe. The great thing about Chinese vegetable stir fry is that you can make it with whatever you have or whatever you want. We keep it simple by having a few items in our pantry that we know we like to use. If you have these items fresh, so much the better. But if you don’t the pantry versions work just as well. Depending upon what ingredients you choose, you can make it a real load of tastes of China.

Chinese Vegetable Stir Fry


Ingredients

Use any all or other veggies for your own veggie stir fry. You can also easily adjust the amount of each veggie depending upon the number of people that you are serving. Here are the items that most often find their way into our veggie stir fry.

Broccoli florets
Snow peas or sugar snap peas
Fresh or canned mushrooms
Carrots, sliced at an angle
Green beans
Cauliflower florets
Onions, diced
Celery, sliced at an angle
Green onions, diced
Fresh garlic, sliced thin or minced
Fresh or jarred ginger root*
Baby corn cobs, fresh corn kernels, or niblets
Sliced water chestnuts
Red, yellow, and orange bell peppers
Fresh or canned bean sprouts
Bamboo shoots
Oil for cooking

*Ginger root tastes much different from ground ginger as a spice. You can certainly add the spice if you like, but taste it first and use it in your sauce rather than directly as an ingredient in your veggie stir fry.

Directions

  1. Heat 1 Tbsp of oil in deep skillet or wok over medium-high. We have a big 14-inch nonstick skillet that works perfectly for us.
  2. When pan is hot add onions for a minute until they soften slightly.
  3. Add 2 Tbsp of water to the pan then add mushrooms, broccoli, and carrots and cook for another 2-3 minutes to soften slightly.
  4. Put any other vegetables you have into the pan and cook for another minute or two to soften.
  5. Add garlic and ginger and cook for 30 seconds.

If you are using a stir fry sauce add it at the last minute right before you pour your Chinese vegetable stir fry from the pan. You can also serve with light or low sodium soy sauce, tamari, black Chinese vinegar or seasoned rice vinegar to sprinkle at will.

Another option is to include small bits of precooked meat like chicken, pork, beef, or shrimp. Add these between steps 4 and 5 so that they warm up but don’t cook too much.

You can eat your Chinese vegetable stir fry on its own for a low carb meal. Or, serve it over rice or noodles. Adding crispy wonton strips on top is also a fun way to finish off the dish.

Chinese Fried Rice

More Tastes Of China

There are many more tastes of China perfect for enjoying at home. We enjoy making a meal of appetizers like soup, dumplings, wontons, scallion pancakes, potstickers, and more with various dipping sauces. You can mix and match as you like. Tastes of China are all about savoring the wonderful flavors as well as enjoying the people you’re sharing them with around the table.

If you have some other favorite tastes of China, let us know what they are!

Save It For Later, Pin It!

Taste of China Pin

Let’s be honest. Last year sucked big time. This year isn’t off to the best start either. But, there’s one thing we can say about how calamitous world events and societal upheaval. They can provide some serious perspective. And what we discovered is that we wanted a simpler life.


So we decided to declutter, streamline, minimize the amount of “stuff” that fills our home and our minds. If you feel We’ll give you a simple step-by-step system that you can use to simplify your life.


cozy minimalism

1. Decide To Simplify


The first way to make a change is to make an affirmative decision that you want a change. When we moved from Chicago to Madison, Wisconsin, we had already made a huge downsize and streamlining. We sold a huge house with a huge yard. We gave away or donated rooms full of furniture, garden and yard equipment, emptied the garage and many closets. And when we moved to our two bedroom apartment we discovered that even though we had simplified some, we were still surrounded by a lot of our stuff. It may have been comforting at the time, but later we found it annoying. We discovered that our cramped feeling was the clear result of still having too much stuff. And with the realization that we trip over some of it more than we use it, we decided it was time to simplify again, this time, for real.

This really helped when we decided to move to Portugal. We ultimately decided to downsize some more but that’s another story.


Simplify Your Life


2. Identify What You Truly Value


While we thought we had decluttered completely in our move to Madison, we really just did the first step. We identified what we truly valued, or thought we did. Gone were the multiples of items of which one would suffice. Multiple sets of dishes and utensils. Family furnishings that other family members could enjoy. Excess clothing that hadn’t been worn in years. In the process of streamlining, we discovered that the things we valued were fairly well identified. Books and kitchen tools. Photos and work product. Computer equipment and music. Souvenirs from our travels. While what truly matters is different for each person, ask yourself these two questions to discover what it is – “How long would it take me to notice that it’s gone? How much will it matter to me?” Based on your answers, you’ll be able to start to minimize the things you keep around you.


Wine and glasses


3. Have An Action Plan To Declutter


There are now so many methods to get rid of stuff that the process of choosing how to do it can become overwhelming. There’s the KonMari Method to keep only things that “spark joy” for you. Or the 40 Bags In 40 Days challenge, where every day you choose something else to put in a bag that goes away. Of course, there are plenty of others. You can look up specific ways to declutter and see what appeals to you. Or test out a few methods and see what works best for you. If you want to engage others in the process, so much the better. Just be sure you clarify who does what so you don’t get stuck with more than you want.


Sharing Pizza


You can also try out our method. We realized that if we died tomorrow, someone would have to go through all our stuff and would probably throw most of it away. That would be a terrible burden to place on someone else. So, we decided to make an action plan to ease that responsibility for our hypothetical afterlife caretaker by streamlining our life now. The basic idea for us was to keep in mind with every item what it would be like to be the person having to make a decision about what to do with what we have. Our goal was to simplify the process for everyone involved.


4. Start With The Hardest Items First


Just like we were taught as youngsters that we couldn’t go out to play until we finished our homework or no dessert until we ate our vegetables, we knew that we would have to declutter the most emotionally difficult items first.


Streamlining The Library


For Diana it was her books. Much as she loves her books, there’s a simple solution. Digital books. She found many e-book versions online through ebook libraries or Amazon Kindle. Others she can check out through her library’s e-book lending service or find to read online at the Internet Archive and Open Library. So she can “borrow” them whenever she wants.  The few books she couldn’t find digital versions of or didn’t want to part with were hers to keep. This act alone took her from several thousand books to about a hundred. We did the same with music CDs and video DVDs. We also scanned photos and documents. The amount of streamlining by going digital is unbelievable.


Books on Desk


Decluttering Clothes


Sue is much more of a fashionista. She decided her softest spot was clothes and in particular, shoes. She started with the clothes that no longer suited her style, size, and taste. Those were easy to purge. Then to simplify further, she looked at her activities and likely future lifestyle. Keeping one business suit instead of several made sense. She decided she could live with fewer pairs of high heels. And she could let go of some boots that were at the edge of usefulness too. To simplify your life you want to think practically. What you may have an attachment to may no longer serve you. When that happens, it’s time to say goodbye.


Organized Clothes Closet

Simplifying The Kitchen


If there’s one area that is challenging for any Food Travelist to streamline, it’s the kitchen. Like all who love to eat, cook, and entertain, our kitchen was full of many wonderful toys, gadgets, utensils, and appliances. We’ve occupied every inch of shelf, cabinet, drawer, and countertop space. Once you desire to simplify your life, you look at all those tools differently. It no longer seems useful to have ten different spatulas, which all serve the same purpose. When is the last time we actually used three slow cookers all at the same time. And how many versions of cheese grater do we really need. Finding tools around the kitchen that we hadn’t even used since moving to Wisconsin made it easy to do the first cut. After that, redundancy and realism took over.


Organized Kitchen Drawer

5. Go Step By Step


When you want to simplify your life, it may be hard to do in one giant purge. We thought we did a great job when we moved from a house to an apartment. And while we did minimize  a lot, over time, we also acquired new things that take up space. We have gone through several rounds of streamlining. Each round makes it easier to see the things that can go. When you do any decluttering and question whether to keep an item, keep it for now, then revisit in a specific time in the future. Six months is usually a good one. If you haven’t used it in six months, do you still want to keep it? If it’s seasonal such as clothing, go through the next season and see if you use it.


Step By Step

6. Simplify Generously


It’s easy to fall into the trap that if you simplify your life, you’re giving something up. In reality, much of what you give away would have great value to someone else. Think of your decluttering as an act of generosity. If we hang on to three slow cookers but only ever use one at a time, there are two people without slow cookers who can benefit if we streamline them out of our cluttered kitchen. When the snow is building up and we give away heavy coats that no longer fit us, we can generously help someone who does not have a heavy winter coat. In a Wisconsin winter, this could literally be a lifesaver.


Donation Bag

Give To Family, Donate Or Sell


There are several ways to generously simplify your life. You can give items directly to others. We did this with items such as photos and family “heirlooms” that we know would be enjoyed and appreciated by younger members of our family. We also chose several local charities that take physical donations. Larger items and furniture can go to places such as Habitat For Humanity ReStore. Clothing and household items can go to organizations with thrift stores such as GoodWill.  Vietnam Veterans of America and other organizations also will arrange for a pickup of your items. Books, games, CDs and DVDs can go to local libraries or, if you want to get a little cash, take them to a used bookstore like Powell’s or Half Price Books. You can also list items for sale on places like Craigslist, local classifieds, and even on Facebook Marketplace.


Shelter Dog

Double The Benefit


Many animal shelters can use extra items too. They can use items for animal care, towels, blankets, and things that will help them run the office. Many of these organizations run on a shoestring. Donations of office or cleaning supplies, pens and pencils, printers or old computers can be a huge help. We love to know that our donations to the local Humane Society Thrift Shop gives a double dose of love. Not only do the items we donate get purchased at a low price by someone who needs them, but the revenue go to help support the important work they do to help the people and animals in our community.


Shelter Kitty


Many religious organizations, missions, and shelters also accept donations of items they can use in rummage sales to generate funds for services they provide and people they support. All of these organizations tend to be quite local, so you can know that the help you provide goes back into your own local community.


Simplify With Purpose


When you realize that your unused or unnecessary items can improve the life of someone less fortunate, it makes parting with them not only easier, but more purposeful as well. When pondering whether to keep or give, ask yourself, who will get more use and benefit out of this item, me or someone else who needs it? Let your answer be your guide.

Clean Desk With Laptop

7. Simplify Your Life – Inside And Out


Decluttering your external environment is a great start as you simplify your life. It will give you a sense of power and control. It will also give you room to breathe, which removes some of the burden that crowds your life and your mind. Once you realize how good it feels to get a little elbow room in your physical surroundings, you may want to simplify your life in other ways too. Simplifying your time, tasks, health, mind, finances, relationships, and more can help you transform an overwhelming, exhausting, complicated life to one that is more balanced, joyful, and free. We know we have only just begun on our journey of simplifying our life. As we continue with our further adventures, we’ll share them with you too.


We’d love to hear about what you have done or are planning to do to simplify your life. Please let us know in the comments below!


Save It For Later

  • Signup for our newsletter

    Be the first to see our latest news, deals and articles.

    Please wait...

    Thank you for sign up!